PO Receiving
Once you've received your order, go to the Inventory List View>Views>P.O. Receiving. Follow these steps to set these items as received in the system.
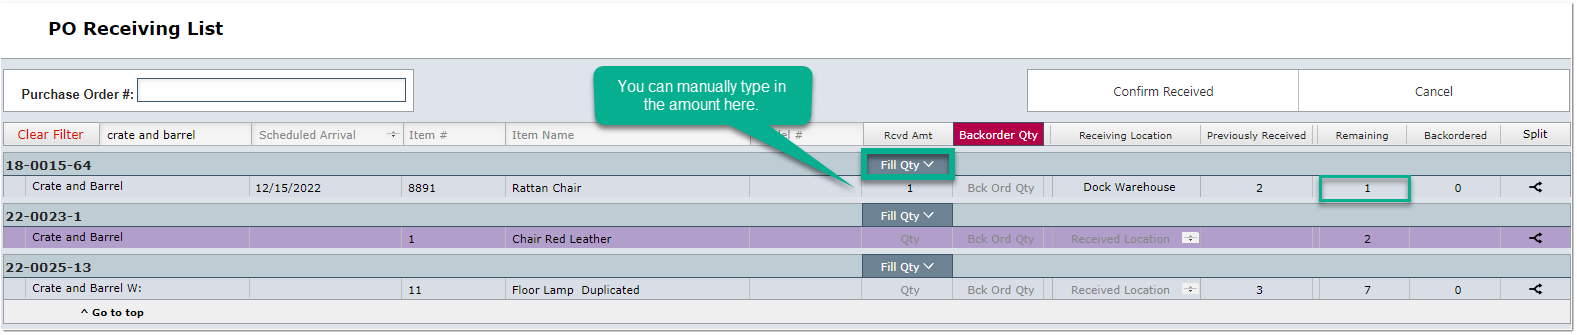
1. Type in the purchase order number to find the P.O. with the items that you're about to receive.
2. You can also use the use the filter bars at the top of the page to find all the items you will be receiving that day.

In some cases, you may receive partial shipments. On this layout you will have the option to split the item you will be partially receiving. You can read more about this by reading this article. P.O Splits
You will also be able to create back orders on this view. Read more about Back orders reading the following article. Back Orders
3. Once you've located the item, type in the amount you have received or click the "Fill Qty" button to enter the entire amount on order.
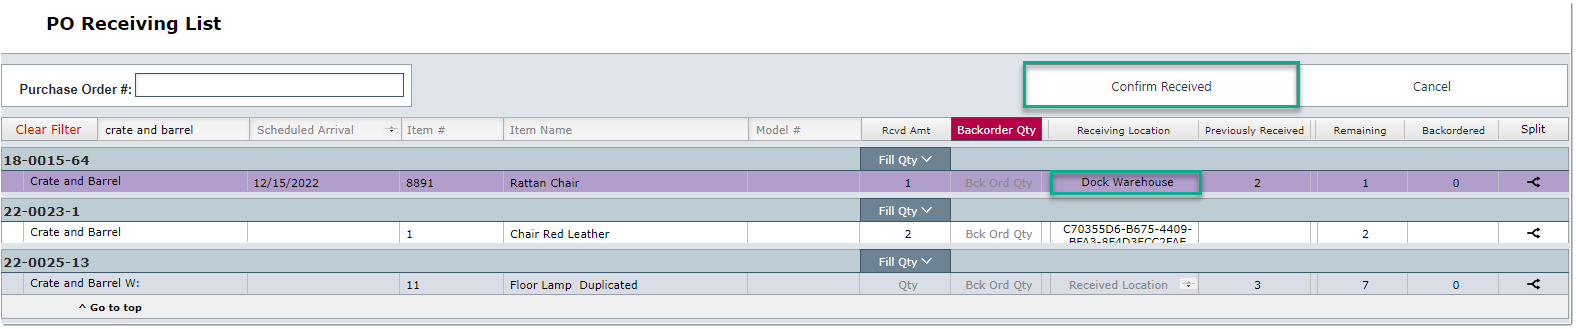
| 4. After stating the amount of items to be received, your "Receiving Location" will be added in automatically. This location will be the same as the location selected for that P.O. You can now click the |
| "Confirm Received" button located at the top right of the page. |
 |
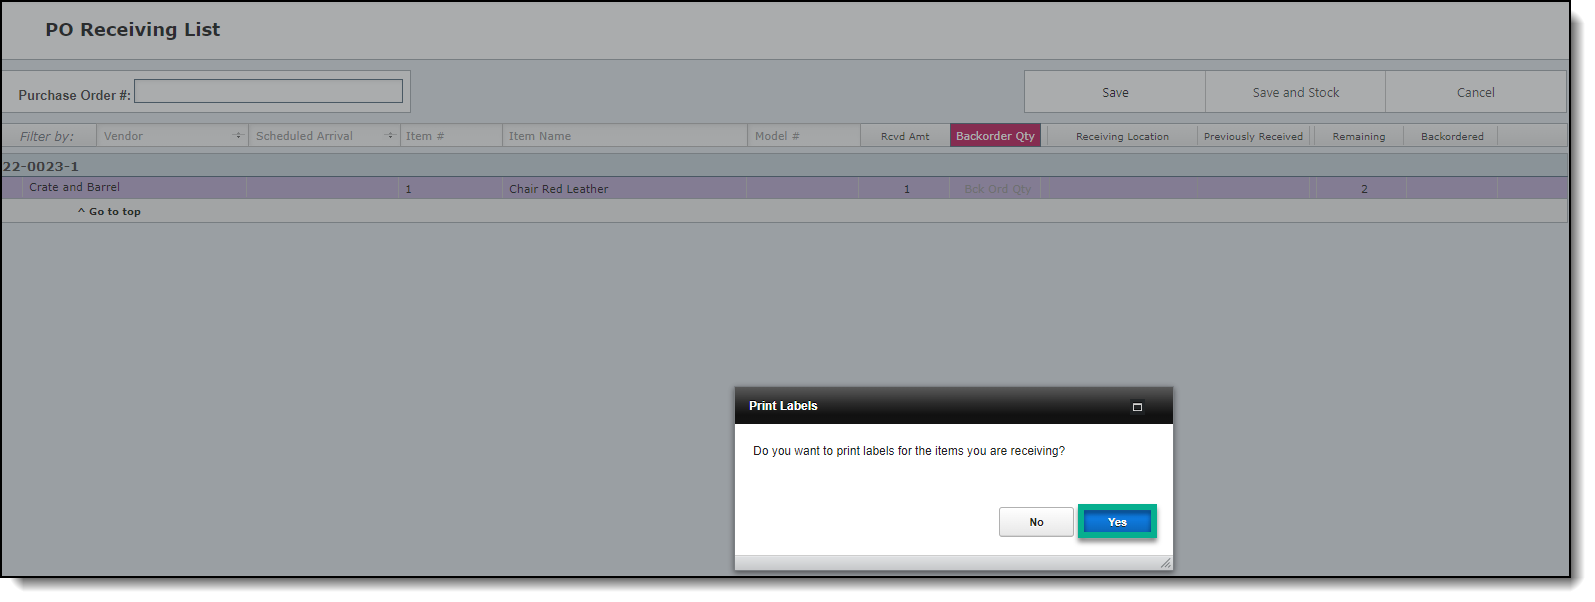
| 5. You will be prompted to save the items you have received on the previous page. |
 |
6. After receiving your item(s) you will be prompted with a screen asking if you would like to print your labels. Click "yes".
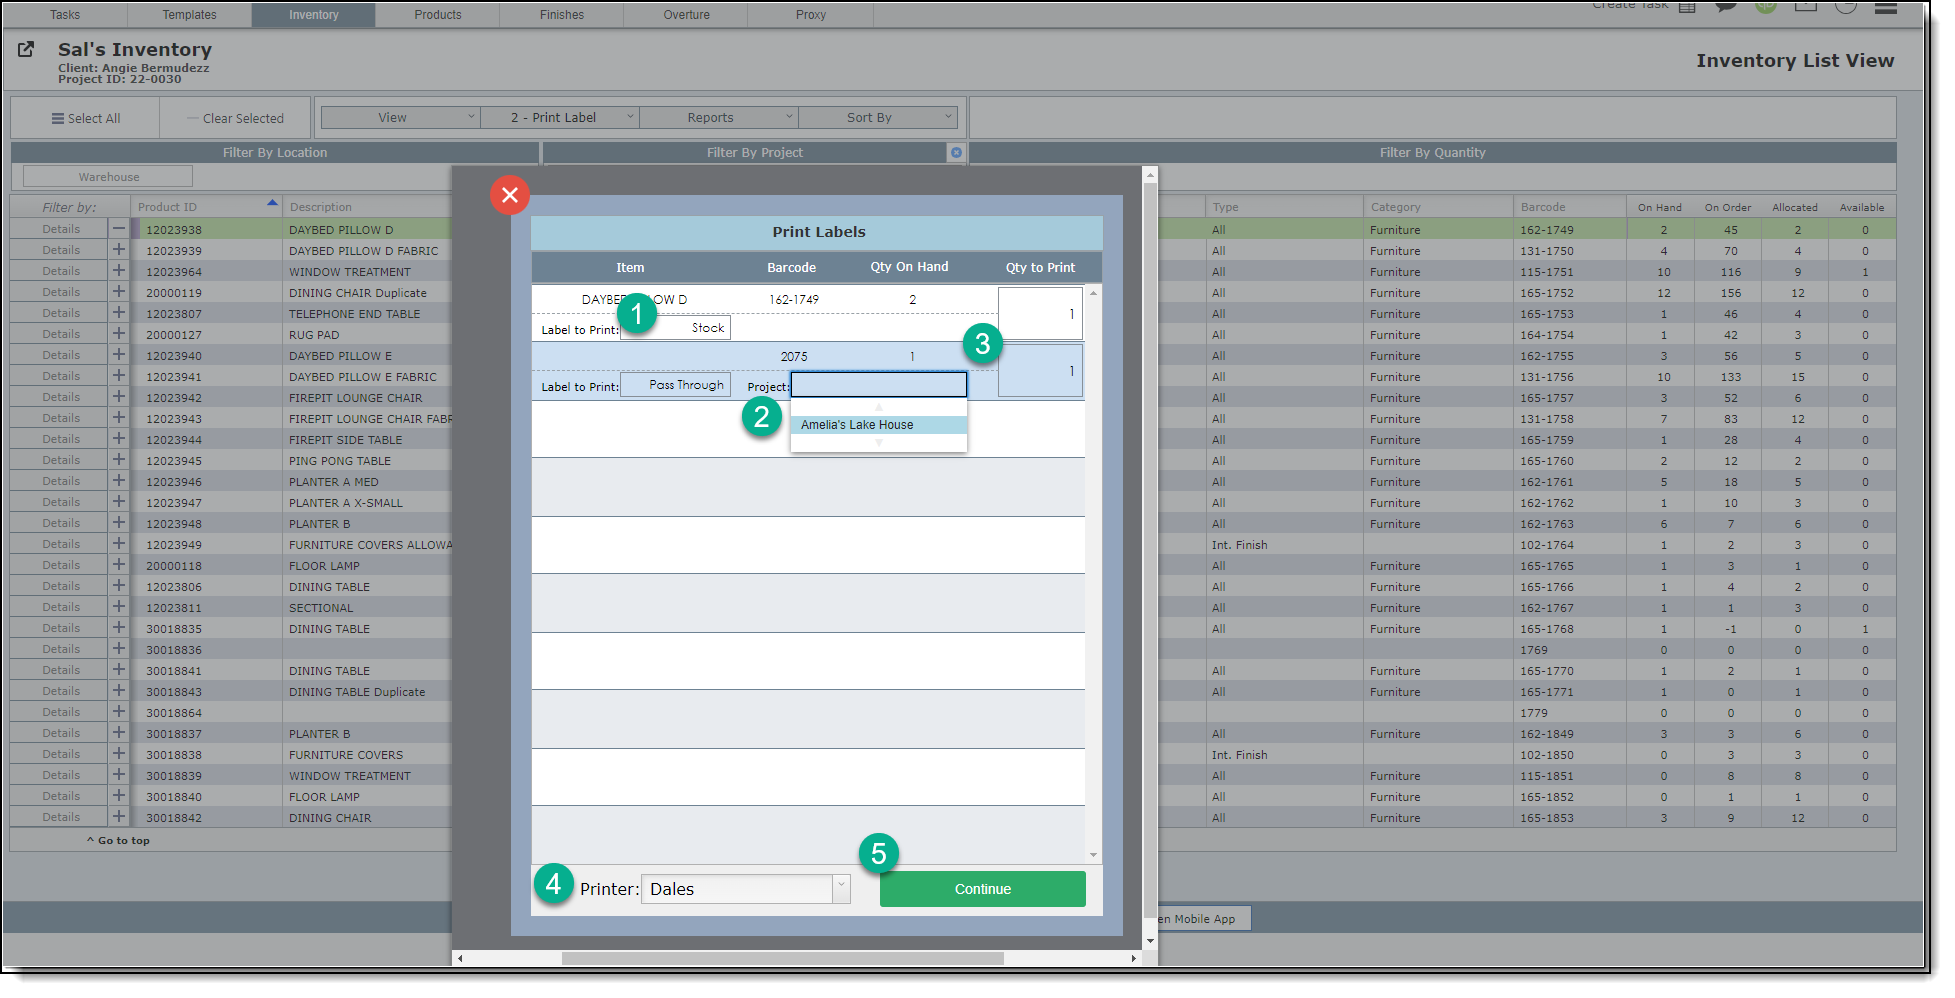
7. This will bring up a window where you will complete the label printing process.
Step 1. Select which type of label you would like to print: Pass through Label or Stock Label.
Step 2. In the case you will be printing a Pass through label, you will be prompted to select the project the item will be "passing through".
Step 3. Fill in the boxes on the right with the quantity of labels you wish to print.
Step 4. Select the printer you would like to use to print.
Step 5. Click "Continue". Your labels will now print out through the selected printer.