|
Creating purchase orders follows the same rules as selecting any action in DesignSmart. If you haven't read the section How Actions Work, please do so now.
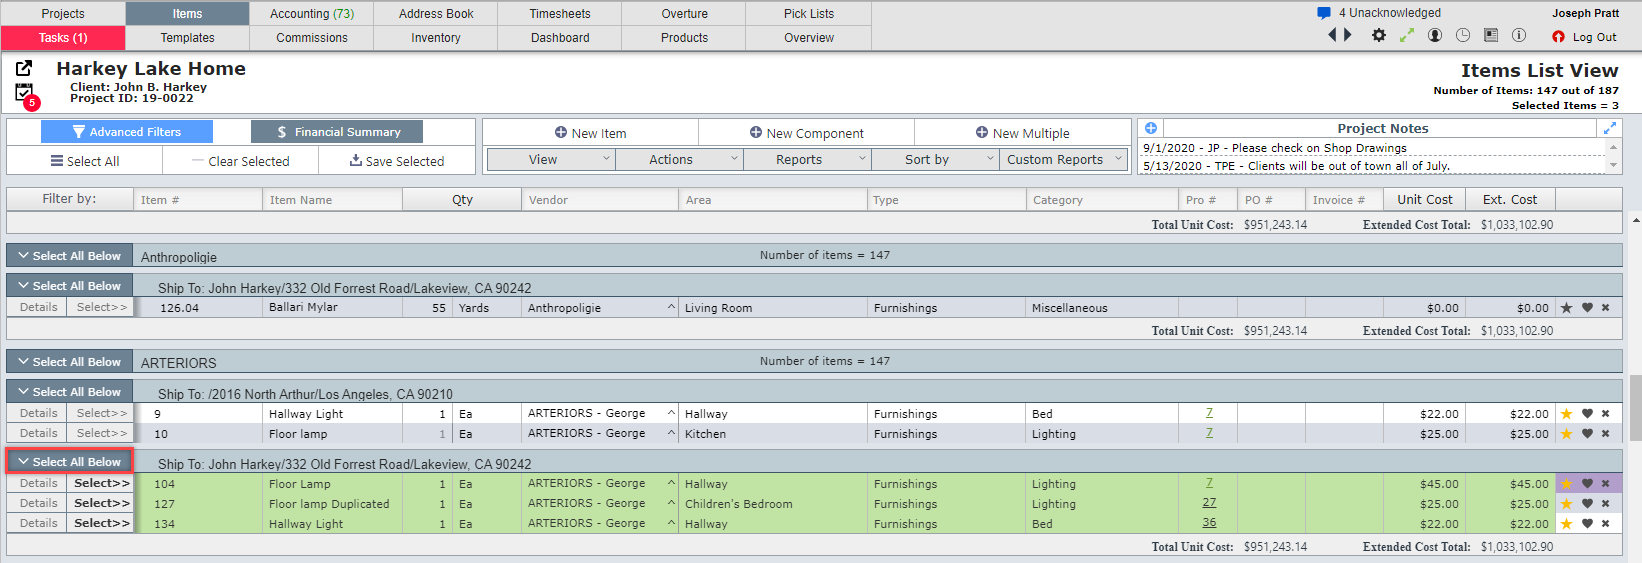
Often the fastest way to select items to order is to use the Sort by pull down and select Vendor or Vendor/Ship To

With the items sorted by Vendor/Ship To, click on the Select button to the left of the items you want to order or click on the Select All Below button shown in red below:

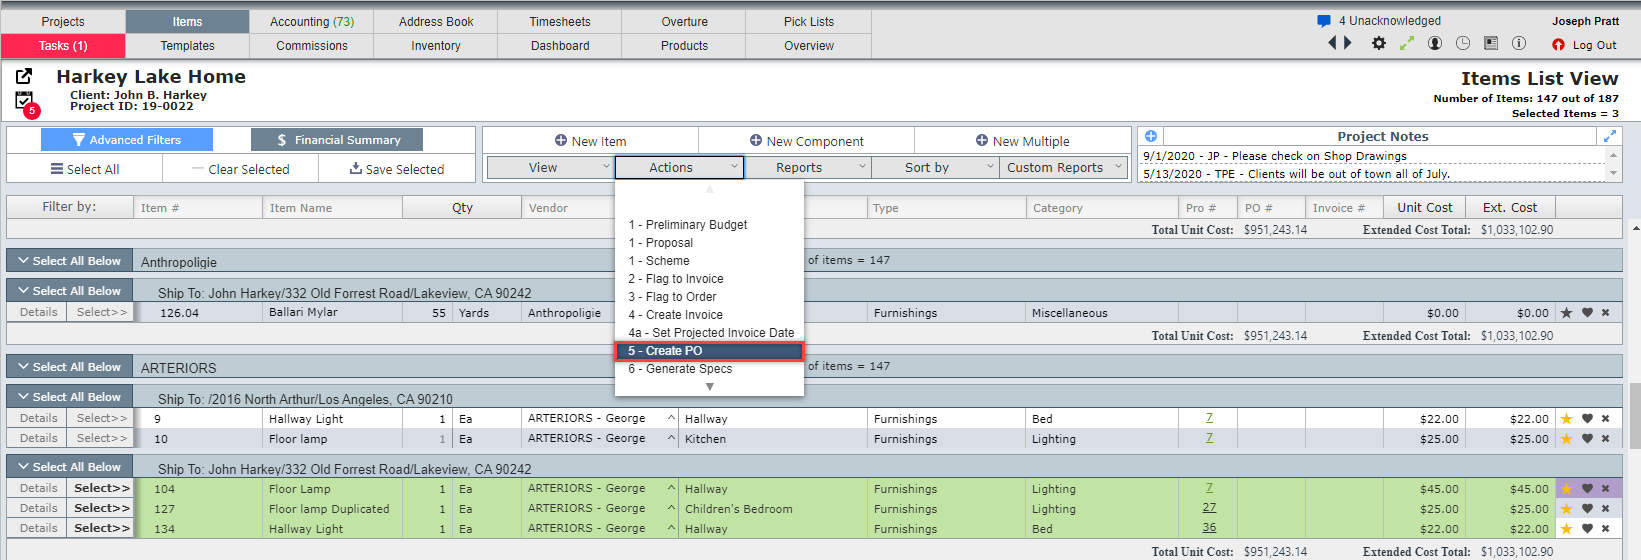
The items selected will be highlighted in green. Click on Actions then on Create PO (note the number to the left of Create PO might be different than that shown).

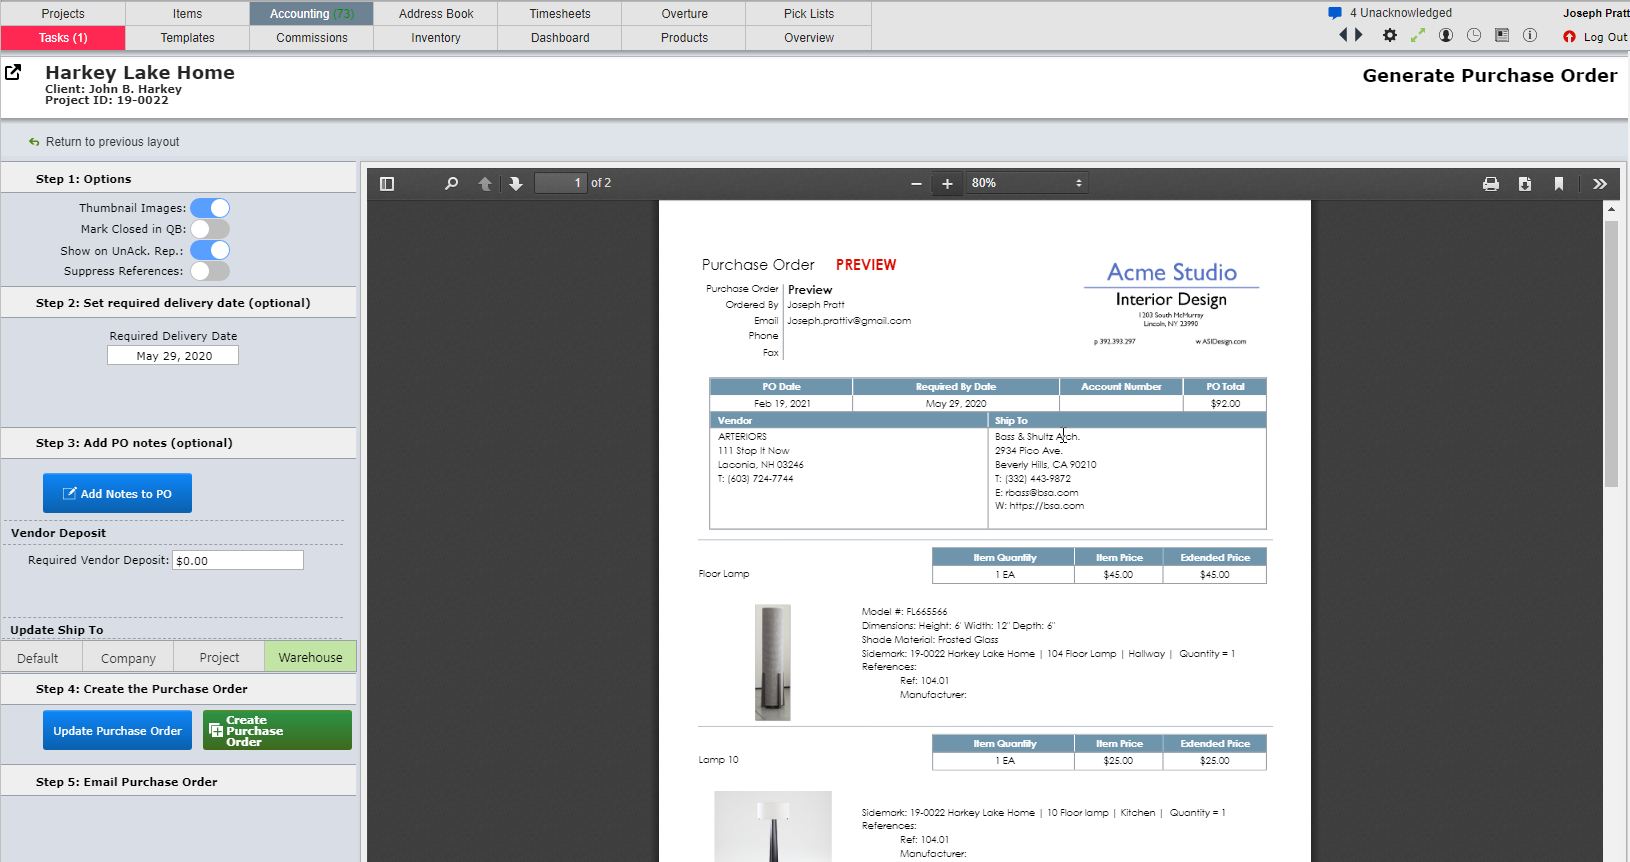
This will cause the purchase order to be displayed in PREVIEW mode. It will not become a purchase order until you click on the green Create Purchase Order button.

Step 1
| 1. Thumbnail Images | Allows you to indicate if you want to include thumbnail images on the purchase order. The default setting for this switch is set in System Preferences. The change will not be seen until you click Update Purchase Order |
| 2. Mark Closed in QB | This will close the purchase in QuickBooks. |
| 3. Show on UnAck Report | The UnAck Report is shorthand for the Unacknowledged POs report. In the Expediting section of this guide you will learn about the importance of this report. However, there will be times you don't need the PO to appear on that report and will want to set this switch to No. |
| 4. Suppress References | When you are creating a purchase order for a chair, or any primary item, you may or may not want to include the details about the component items. |
Step 2
| 1. Set Required Delivery Date | If you have a "Required Ship Date" set in the Project Detail View, it will appear here. Otherwise you can enter a date if required. If you enter or change this date, the change will not be seen until you click Update Purchase Order. |
Step 3
| 1. Add PO Notes | You can click on this button to view a list of the predefined purchase order notes or to enter a note manually. The predefined notes are set up in System Preferences in the Customizable Lists sub tab. |
| 2. Update Ship to address | Update the ship to address to any of the four predefined ship to addresses at the last minute before creating the purchase order. |
Step 4
| 1. Update Purchase Order | Click if you change any of the settings above in order to see the changes reflected in the Preview PO. |
| 2. Create Purchase Order | When the PO is correct, click on the Create Purchase Order button. This action will convert the preview to a real PO by assigning it a PO number. |
Step 5
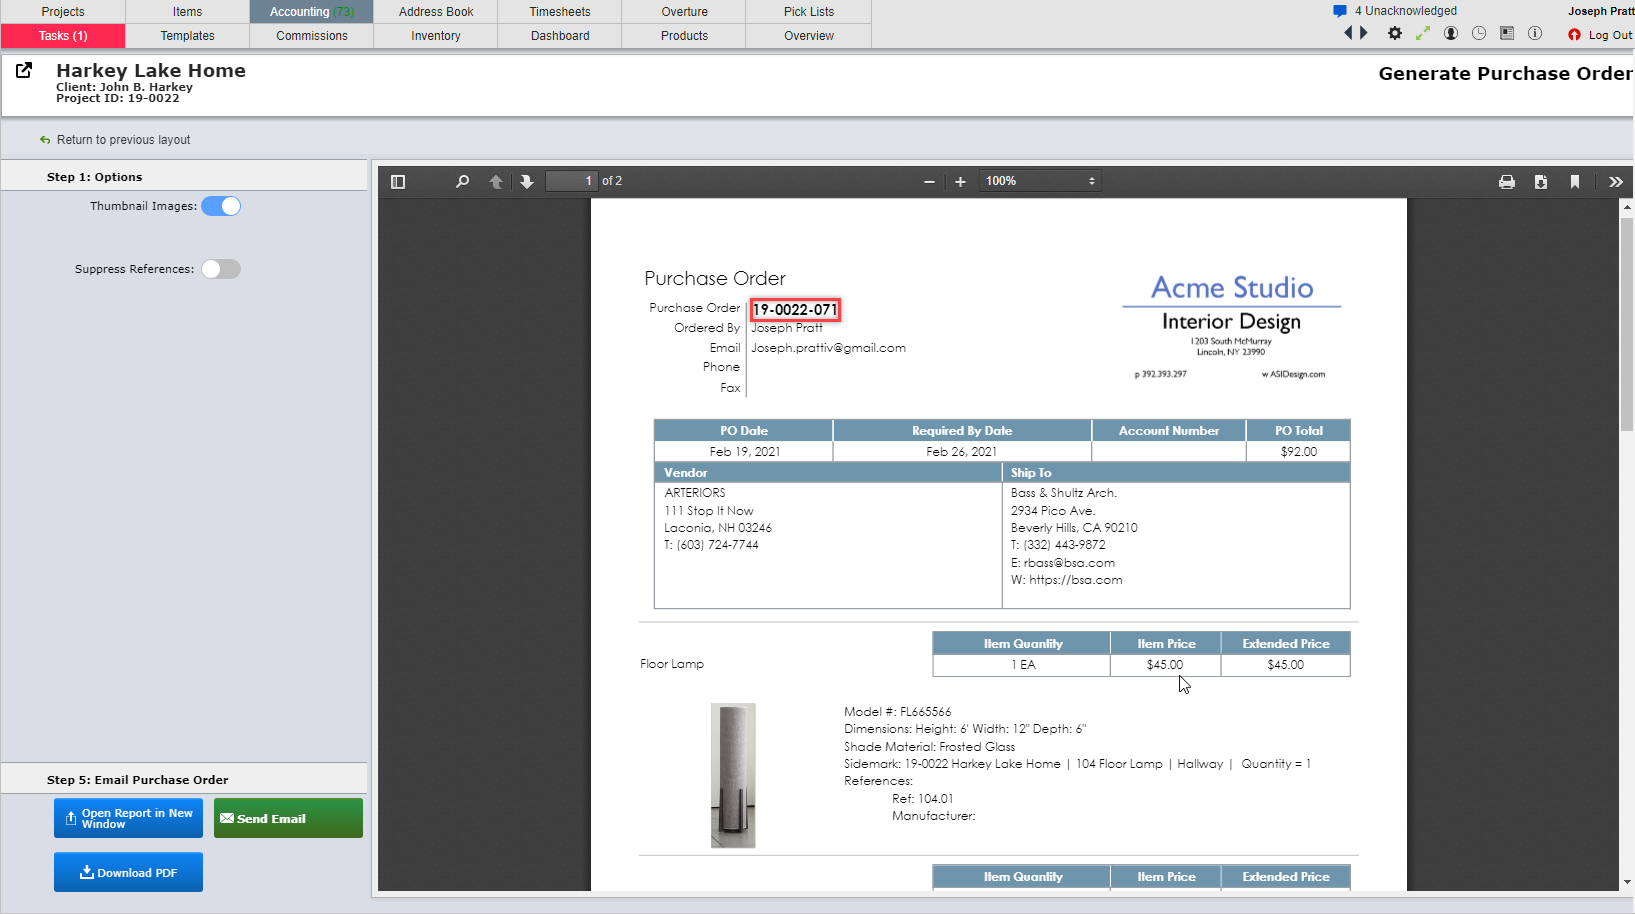
| 1. Email PO | Click to email the PO. This will appear after the PO has been created. |
The complete PO will appear as shown below. The word Preview is replaced with the purchase order number. For most firms, the purchase order number will be comprised of the Project ID number followed by the next sequential number for this project. In the example below, the project ID number is 19-0022 and this is the 71st PO for this project.
