Your Project Manager Will Walk You Through This
Configuring DesignSmart to work with QuickBooks the first time can be daunting, so your assigned Project Manager will walk you through the process step-by-step.
Consulting with Your Account is Recommended
|
Even though your Project Manager will walk you through the configuration process, to ensure that your QBooks file is as accurate as possible, we highly recommend that you consult and/or involve your accountant during this process or shortly thereafter.
Configuring the QuickBooks Connector
To access the QuickBooks Connector area of DesignSmart:
1.Click on the Gear icon in the top right corner of any screen
2.Then on the System Preferences layout, click on the QuickBooks Connector link
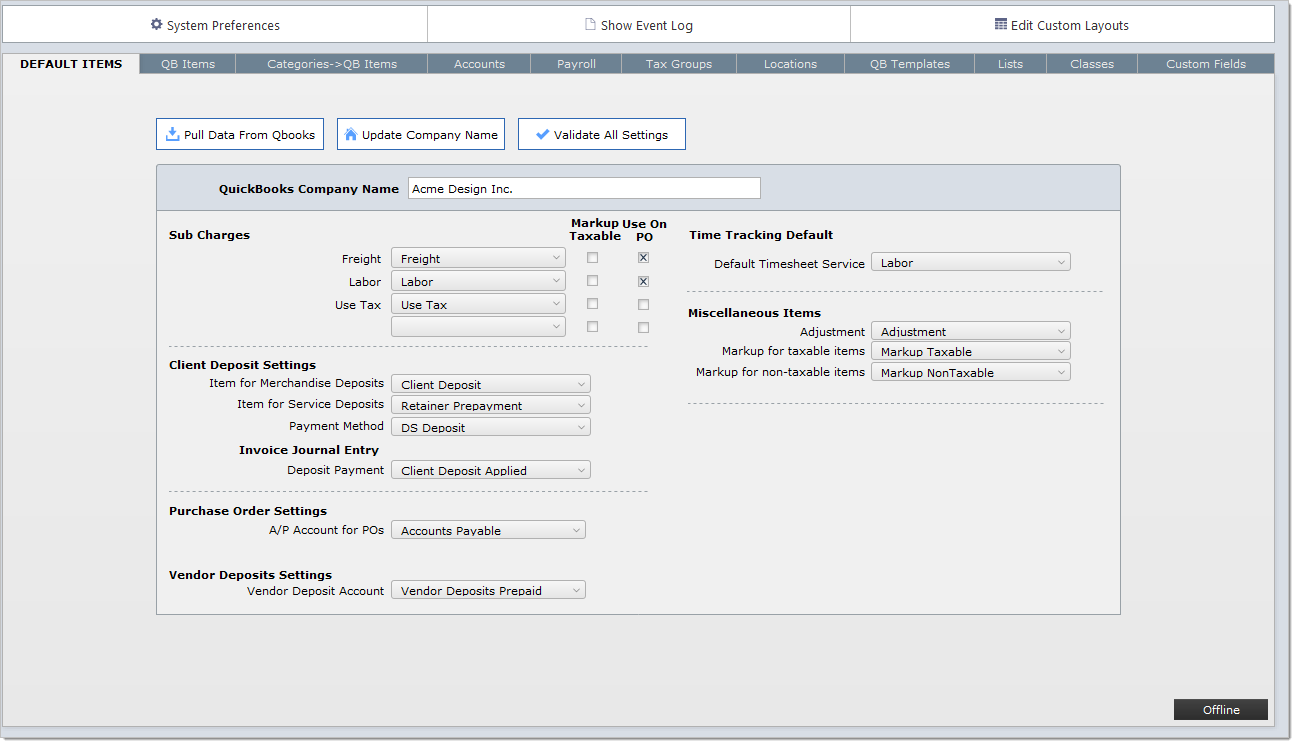
You should now see something similar to below:

You will see more fields in the layout above if your firm uses the DesignSmart Inventory module
Confirm DesignSmart is Connected to QuickBooks
Read the section Connecting to QuickBooks to confirm the two programs are connected.
Click the Update Company Name button
Click the Update Company Name button. The company name set up in QuickBooks should appear in the field below the button.

|
Click the Pull Data From QBooks
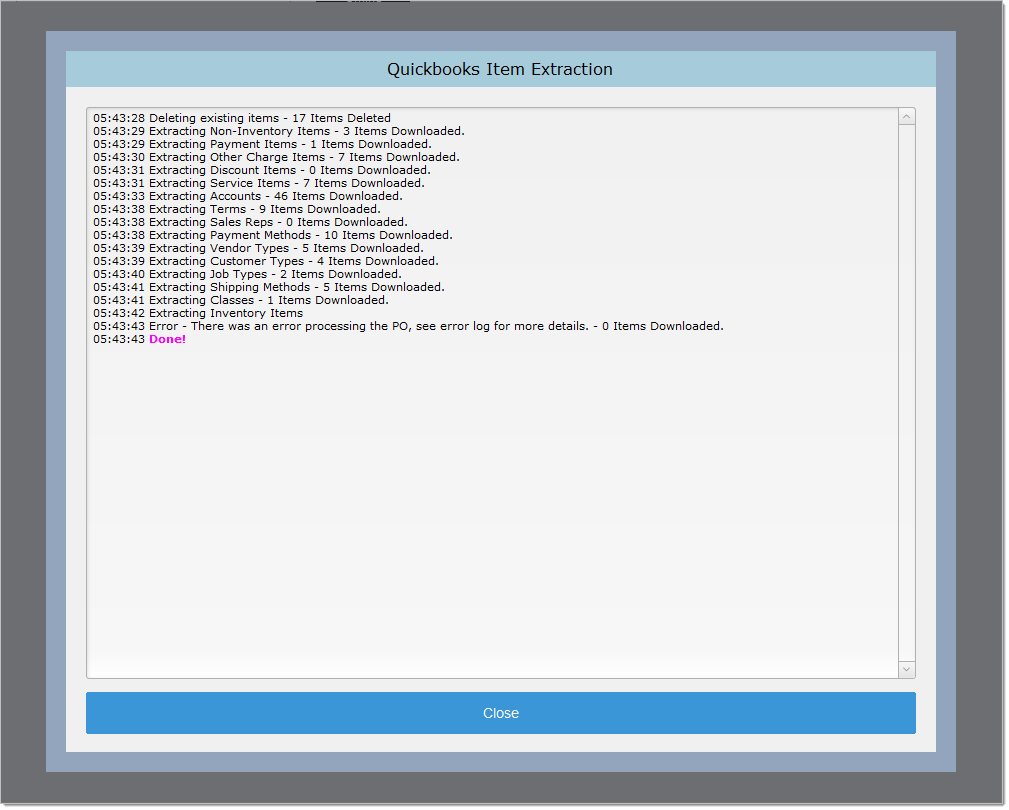
Click the Pull Data From QBooks button to pull data from QuickBooks to DesignSmart
When the data extraction is completed you will see the screen below. Note, the data extraction can take several minutes depending on how much data is in QuickBooks.
The tip below is very important to remember.
|
Typically, once you have DesignSmart and QuickBooks linked correctly, you won't need to pull data down from QBooks. But you will need to pull data whenever one of these occurs:
•If you add a new sales tax group to QBooks
•If you add a new item in QBooks that you want to link to a category in DesignSmart
•If you change an account in QBooks that is used in DesignSmart
Validate All Settings
After you have completed all the configuration settings explained in the the following sections, click the Validate All Settings button.
The tip below is very important to remember.
|

