Defining your Inventory Locations
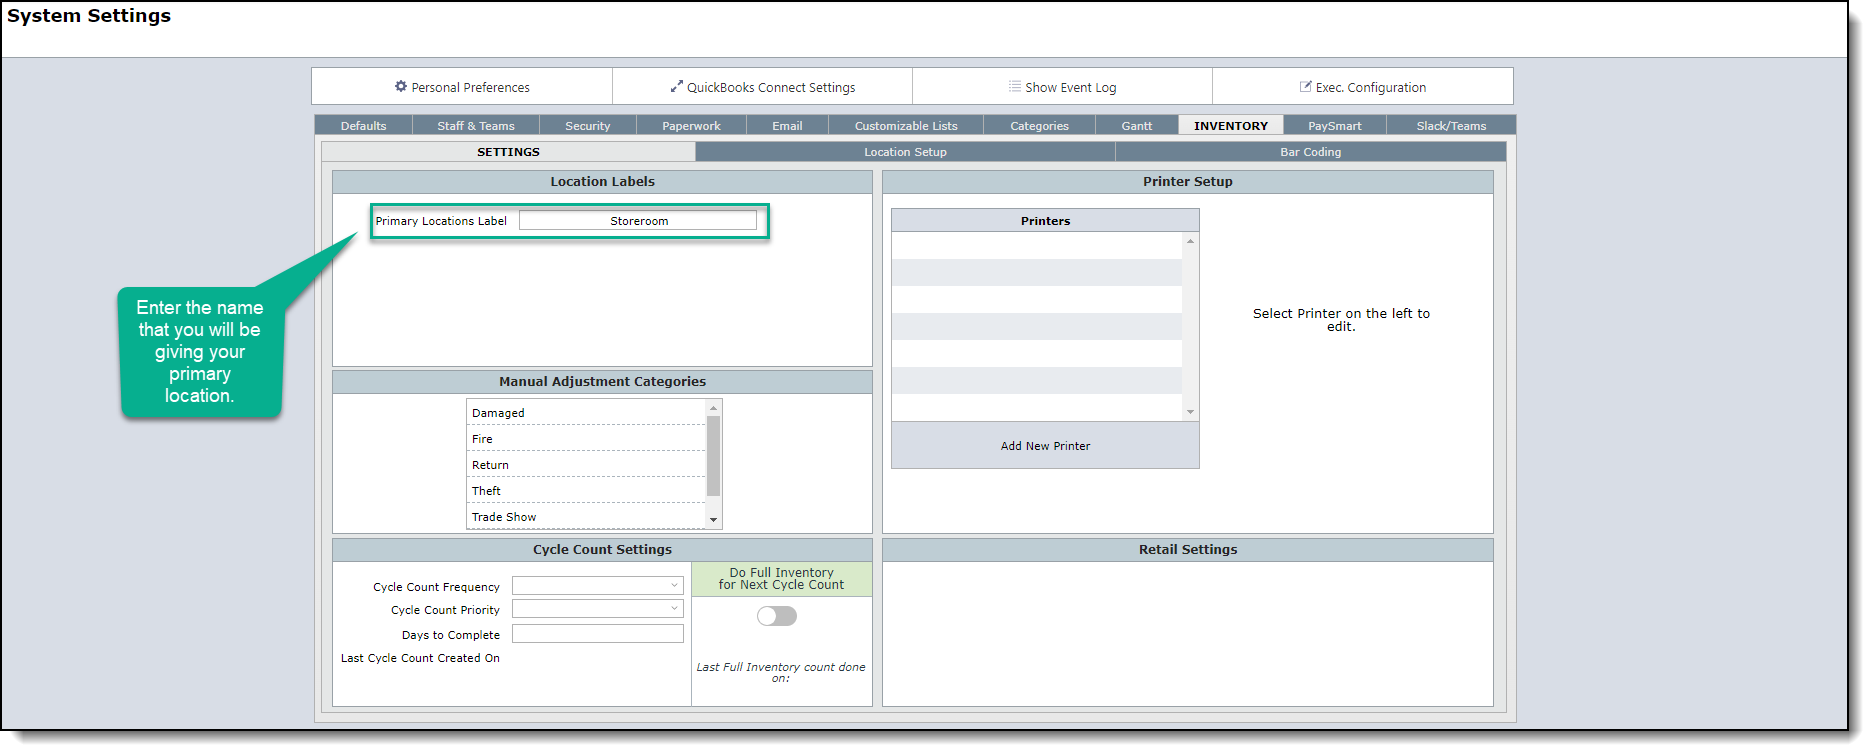
1. First you'll need to set the name of your available locations. In the Entry Level version of the DesignSmart Inventory System you can have one level of inventory locations. For example, this level of locations: "Storage Area" or "Storeroom"
| To setup these locations go to System Settings and select Inventory>Settings. |

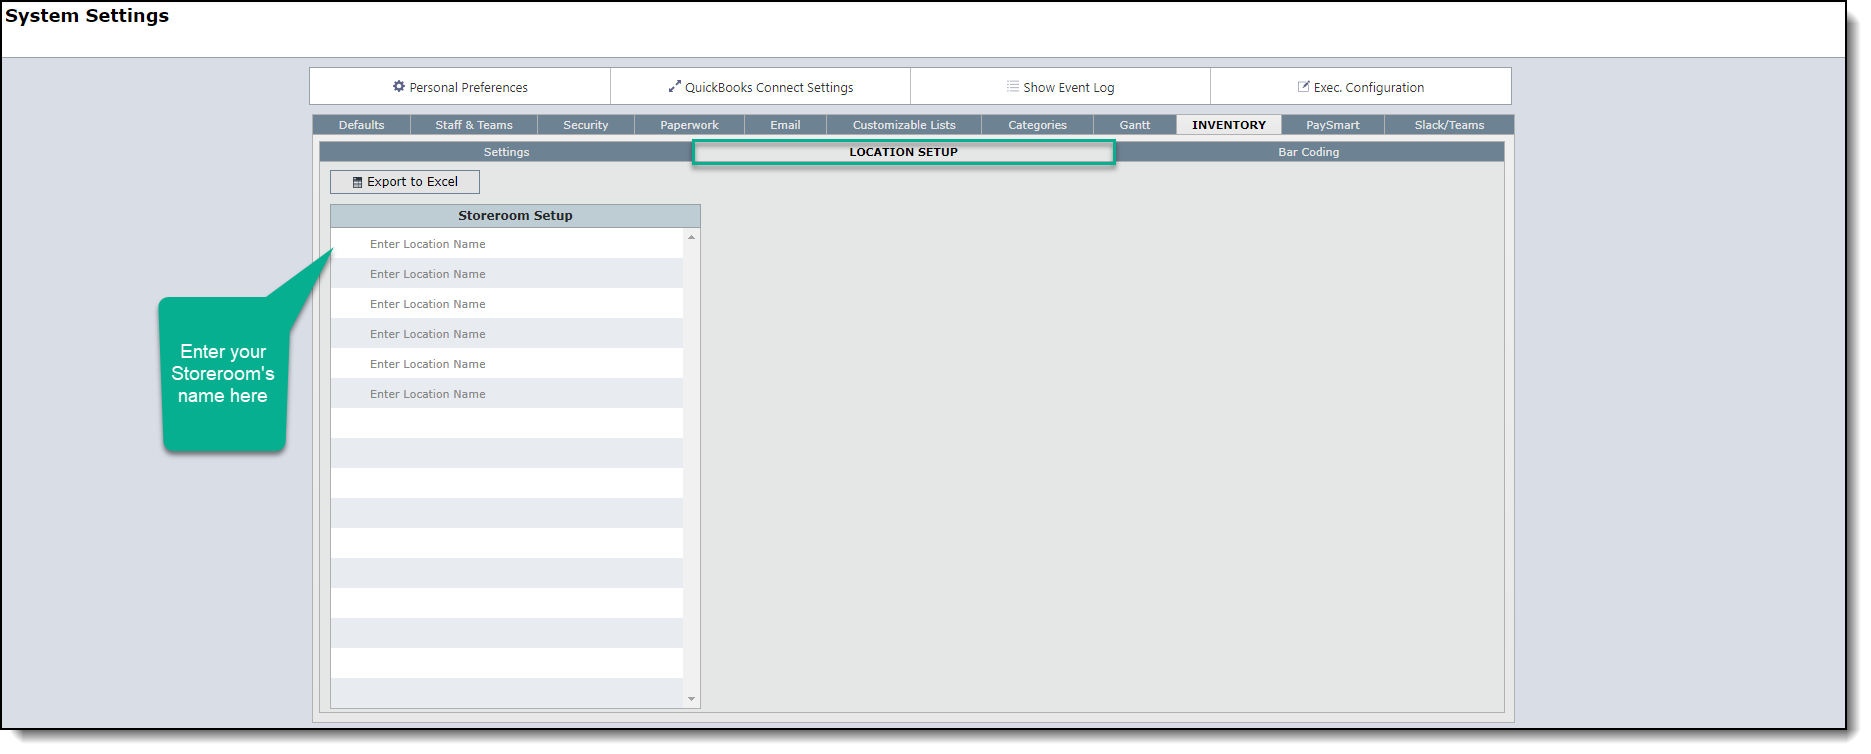
2. After setting your primary location's name, you will need to set up the names for each location. You can do this by going to the next tab, Location Setup.

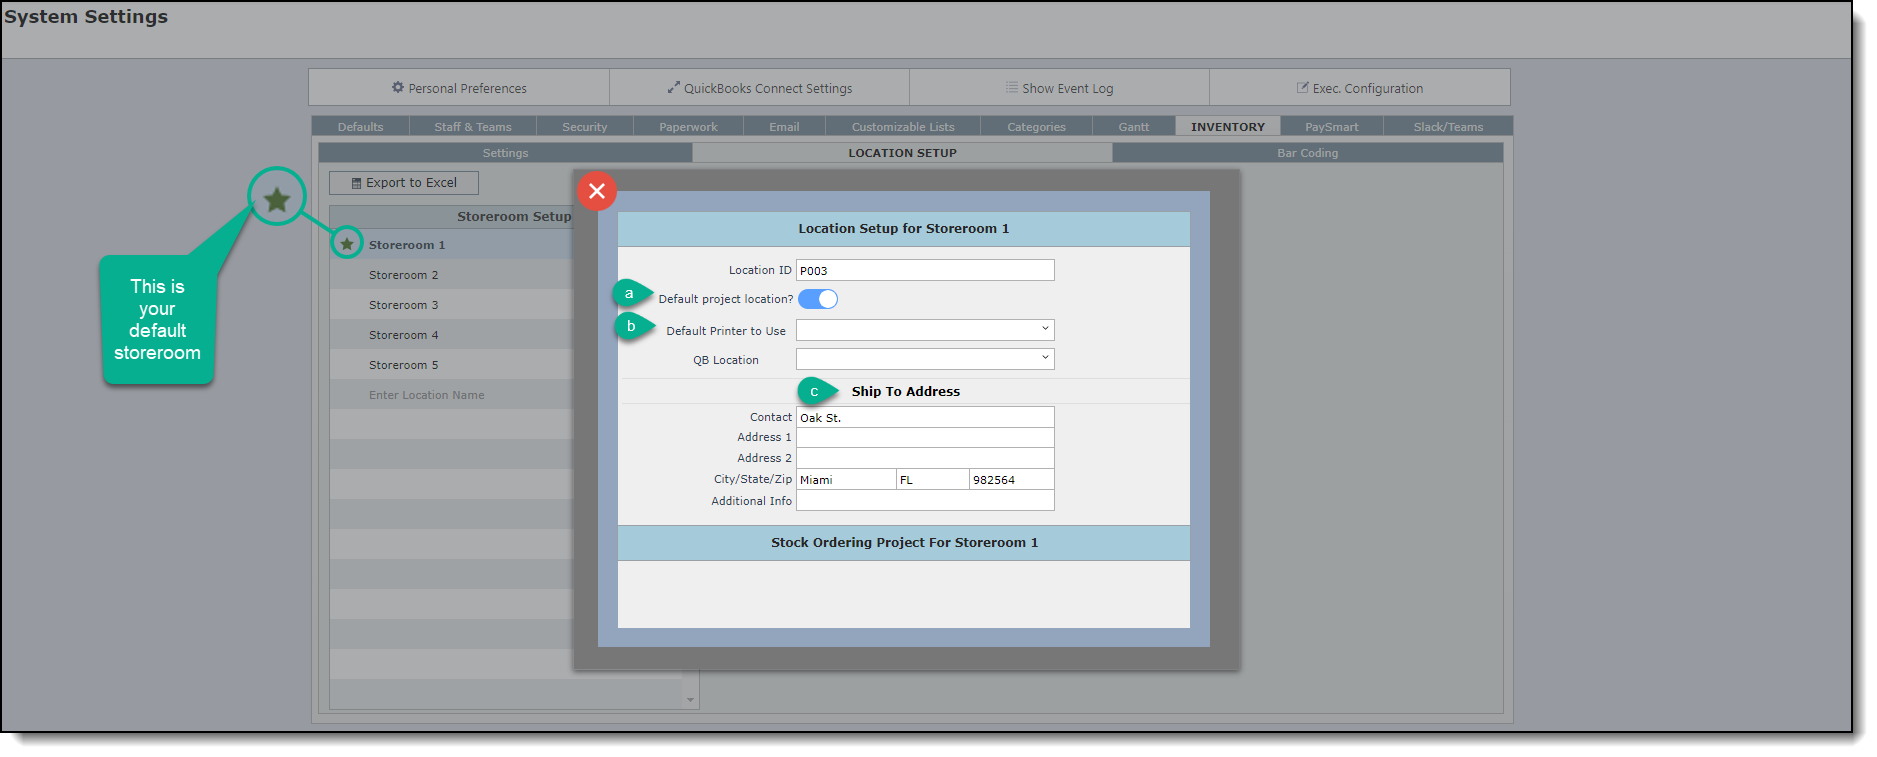
3. Enter the name of your storeroom and click on the pencil icon to edit the storeroom's information.
a. Here you can set this storeroom as your default warehouse. This is what will cause the star to appear. You can only have one Default Project Location for the entire firm. A default storeroom means that primary location will be chosen in your project details as your receiving storeroom for that project.
b. You will need to set the default printer to be used.
c. Then finally, write in the 'Ship to' address for this storage location.

Notes:
1.Even though the Location ID is automatically created, you can change it to your preference.
2.You only need "ship to addresses" for locations you expect to have POs shipped to.
3.You will only have the option to define a printer at the your Default Project Location.
4.You must have defined your barcode printer before you can select it on this screen. You can learn more about that here.
5.The option to select your default printer is optional.