Defining your Inventory Locations
The Advanced Level of the DesignSmart Inventory System allows you to have up to 3 levels of inventory locations and you can define these levels. Here are some examples:
Level 1 - Warehouse
Level 2 - Rack
Level 3 - Bin
These inventory levels will be key in defining the bin label ID. See the examples below:
Level 1 |
Level 2 |
Level 3 |
Bin Label ID |
Warehouse 1 |
|
|
|
|
Rack 1 |
Bin 1 |
W1-R1-B1 |
|
Rack 1 |
Bin 2 |
W1-R1-B2 |
|
Rack 1 |
Bin 3 |
W1-R1-B3 |
|
Rack 2 |
Bin 1 |
W1-R2-B1 |
|
Rack 2 |
Bin 2 |
W1-R2-B2 |
|
Rack 2 |
Bin 3 |
W1-R2-B3 |
Warehouse 2 |
|
|
|
|
Rack 1 |
Bin 1 |
W2-R1-B1 |
|
Rack 1 |
Bin 2 |
W2-R1-B2 |
|
Rack 1 |
Bin 3 |
W2-R1-B3 |
|
Rack 2 |
Bin 1 |
W2-R2-B1 |
|
Rack 2 |
Bin 2 |
W2-R2-B2 |
|
Rack 2 |
Bin 3 |
W2-R2-B3 |
Stockroom A |
|
|
|
|
Quadrant 1 |
|
SA-Q1 |
|
Quadrant 2 |
|
SA-Q2 |
|
Quadrant 3 |
|
SA-Q3 |
|
Quadrant 4 |
|
SA-Q4 |
Notes
1.The locations above are only examples. You can use whatever naming system that works best for your firm.
2.The bin labels will have both the human readable (W1-R1-B1) as well as a bar code that encodes the bin label ID so the location can be scanned. (And if the bar code cannot be scanned the user can key in the bin label ID).
3.If your firm is also using our Point of Sale system, then stores cannot have Level 2 or 3.
4.If your firm can provide these inventory locations electronically, we can import them.
Setting Primary Locations
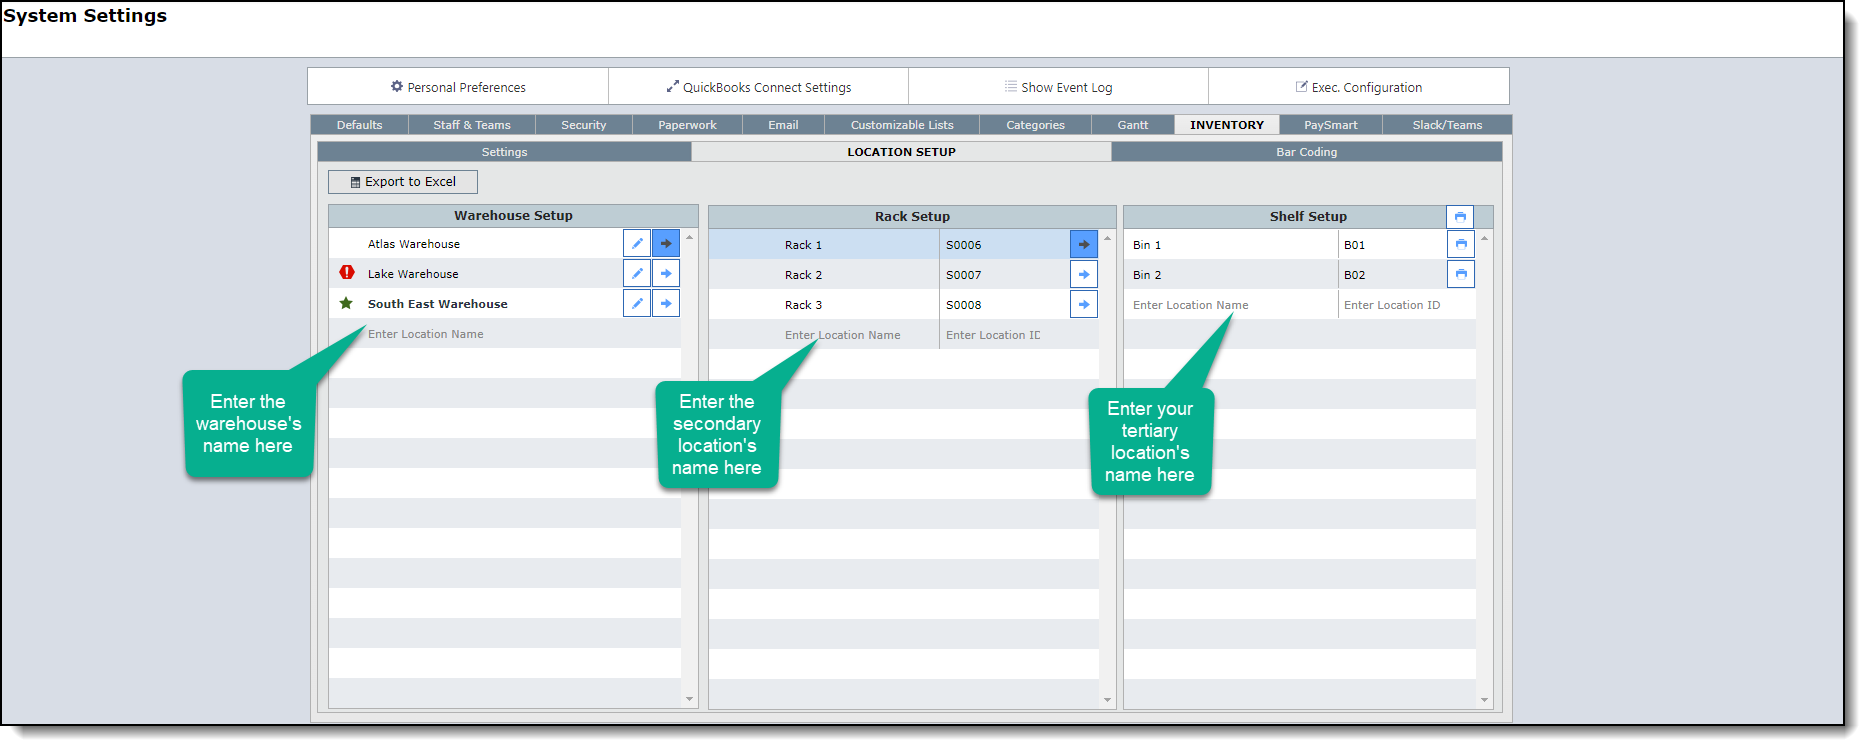
Once you have determined the terminologies for the locations, you will enter the Primary Locations in the screen below.
In the example below, the firm is using the terms: Warehouse, Shelf and Bin.

Notes
1.It is not necessary to have Tertiary level locations. If your firm will not use these, then they can be turned off.
2.Once your inventory system goes live, you cannot turn the Tertiary switch on or off.
3.If Tertiary locations will be used, then all items must have a tertiary location.
Setting Secondary and Tertiary Locations
When your Primary Locations are entered, then click on the Location Setup tab.
Click on the arrow to the right of the Primary Location to enter the Secondary Location.
Then click on the arrow next to the Secondary Location to enter the Tertiary Location.
For example: Warehouse 1> Rack 1> Bin 1.1
Warehouse 2> Rack 2> Bin 2.1
Warehouse 3> Rack 3> Bin 3.1

Notes: Once you've typed in your the location name for both Secondary and Tertiary locations, the system will automatically add the location ID for these location names.
The exclamation mark that may appear next to your warehouse location means that this warehouse still needs to have its Secondary and Tertiary locations set up.

Meanwhile, the star means that this is the Default warehouse which will be chosen for your projects created in the system. You can set your default warehouse by clicking the pencil icon found next to the warehouse's name.
![]()
How to print your Location Labels
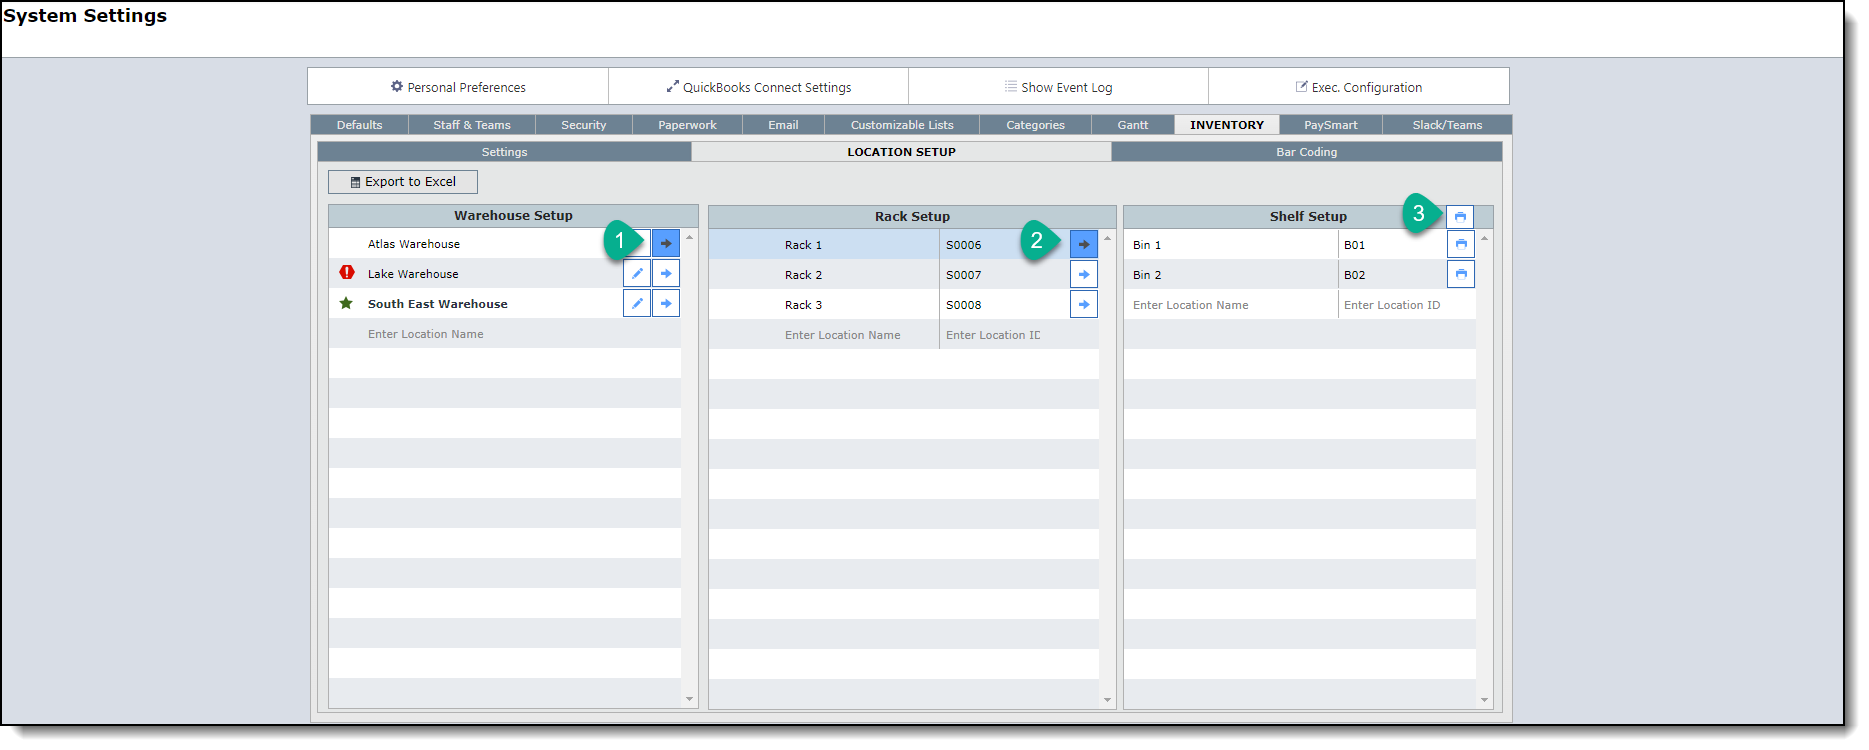
Go to System Settings>Location Setup.
1. Select the location you would like print its label by clicking the arrow in the Primary Setup section.
2. Click the arrow found in the Secondary Setup location.
3. Click the printer icon found in Tertiary Setup location.

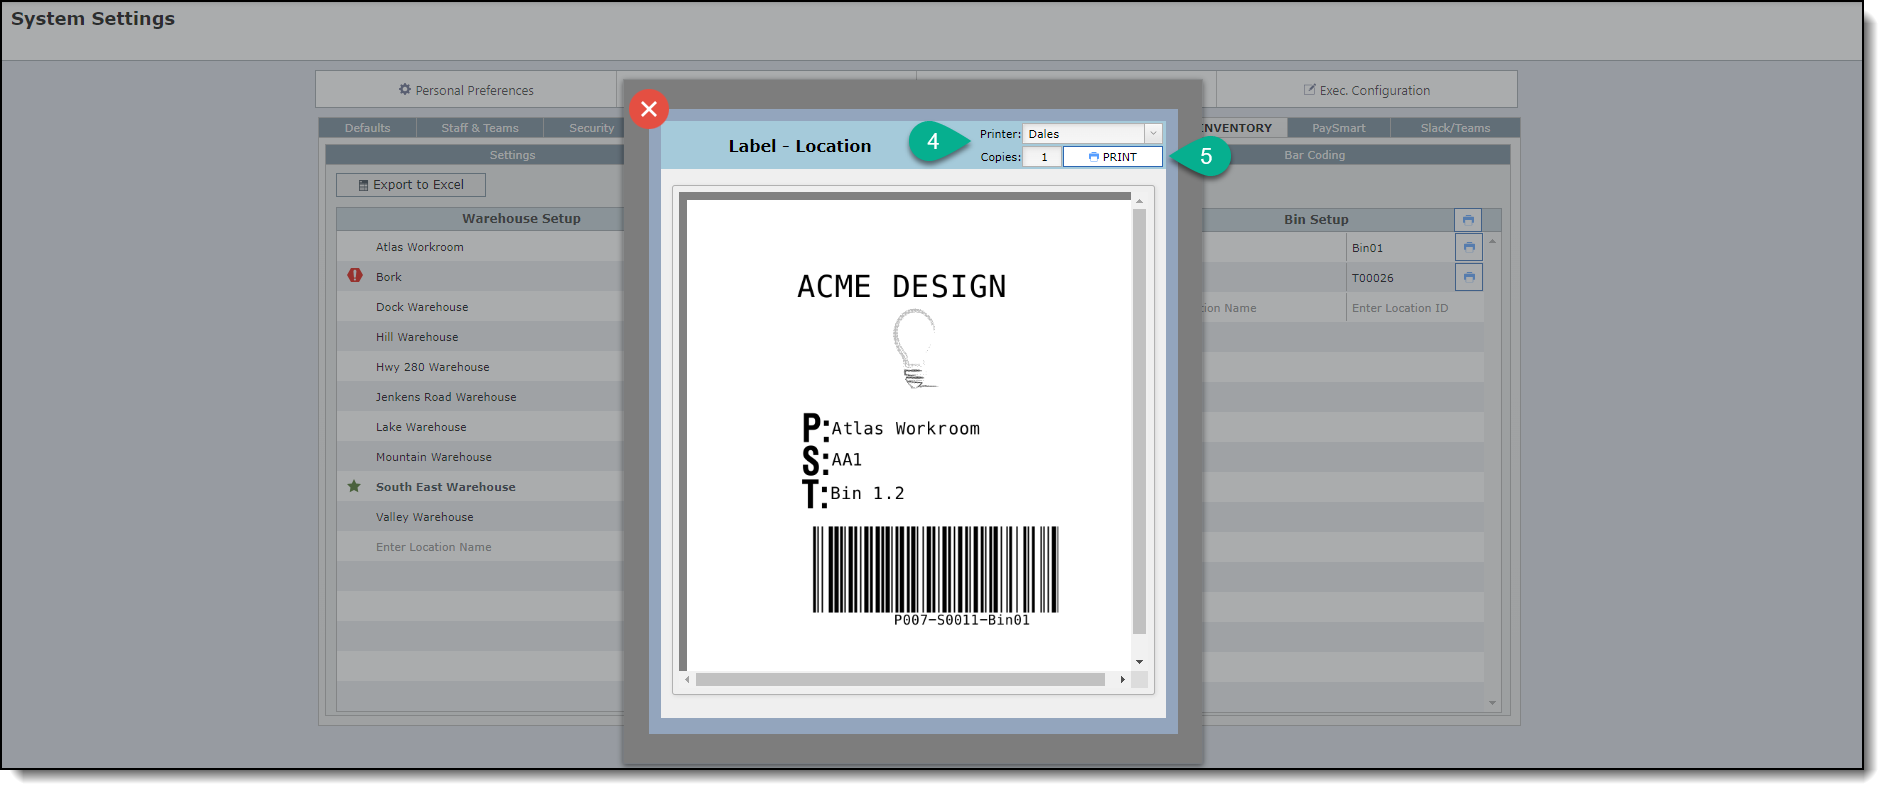
4. Select your printer and enter the number of copies you would like to print.
5. Click "Print" to print out your location labels.
