It is not uncommon to accidentally click on the New Item button when you meant to click on the New Component button. The steps below explain how to manually change a primary item to a component item and manually link it to the appropriate primary item.
In the image below the designer intended to add fabric as a component to the upholstered chairs but clicked on the New Item button instead. Now she needs to link them together.

| Step 1 | Go to the Item Detail view for what you want to be the component and change the Classification from Primary Spec to Component Spec |

| Step 2 | Make certain that the Area for the component item is set to the same area as the Primary Spec Item |
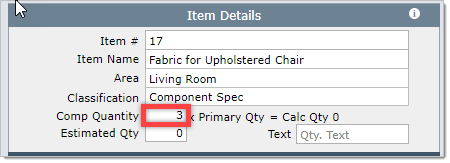
| Step 3 | In the Component Quantity field, enter how many yards of fabric are required for each primary item. In this example each chair requires 3 yards. |
| In the screen shot below, do not worry about the Estimated Quantity being 0. The reason the 0 shows is because this item is not linked to the primary. |
 |
| Step 4 | As indicated in the screen shot below, click on the References tab, then enter the item number of the primary spec item you wish to link this to, then click the Link button. |

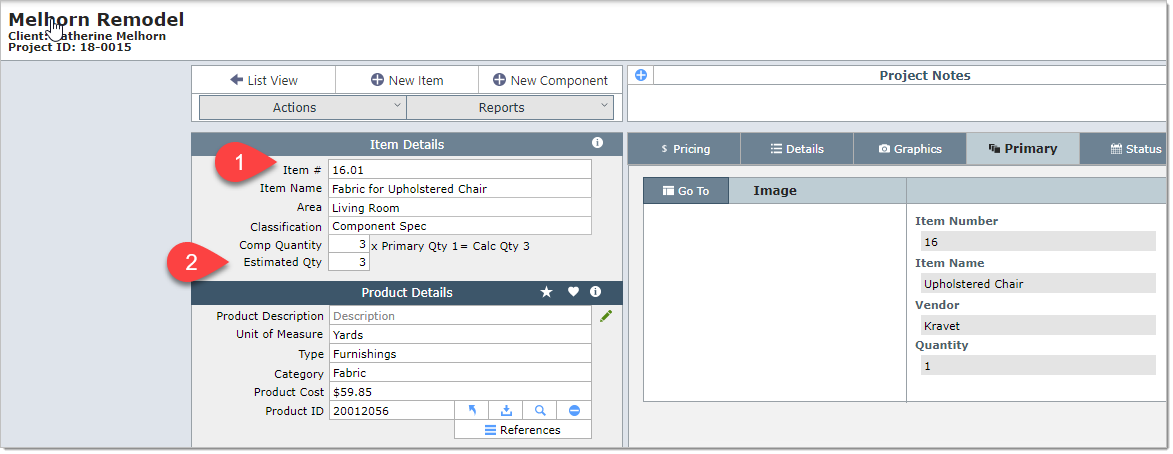
| Step 5 | 1. Change the Item # for the component to the correct number. In this example you would enter16.01 |
| 2. Then update the Estimated Quantity field with the appropriate number. The Calculated Quantity below is 3, so you would normally enter 3 in the Estimated Quantity field. |
