System Preference Settings
Before you start using Overture, your System Administrator will need to go System Preferences and do two tasks:
1.Add a logo for the Overture documents
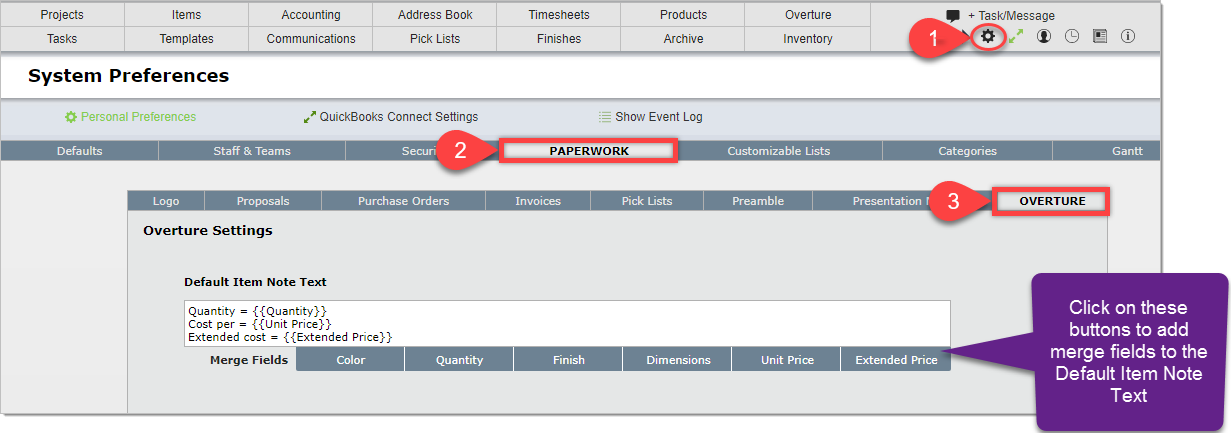
2.Add the Default Item Text Note merge text
Add your firm's logo for Overture
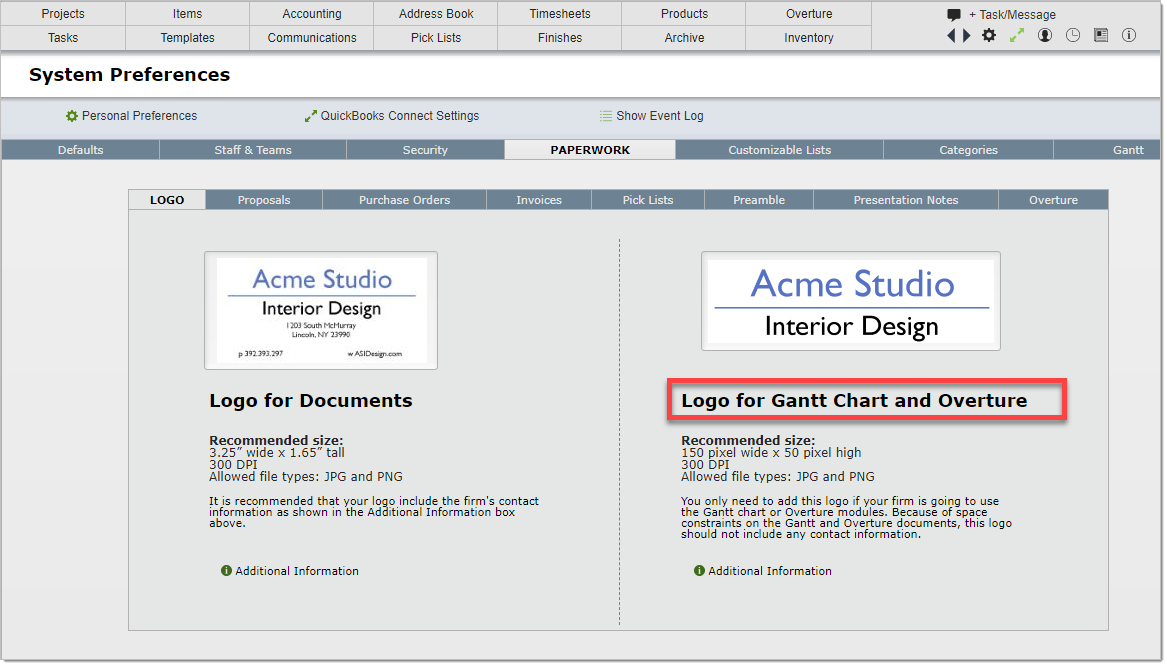
1.On the Paperwork >> Logo tab, add your company logo where indicated.
This logo will differ from the one used for documents, such as proposals, purchase orders and specifications, because it needs to be wide and thin to conform with space constraints of the Overture pages.

Setting up the Default Item Note Text
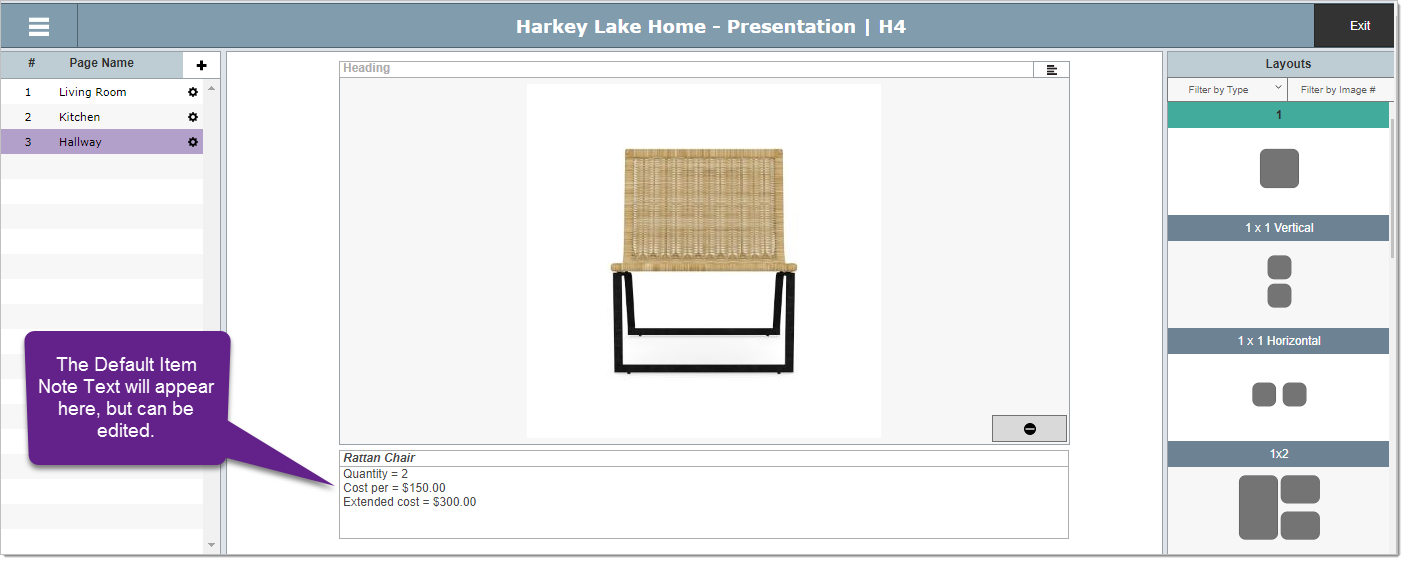
The Default Item Note Text will use "merge fields" so that you can control what item information is shown under each image on a Standard Page. For example, in the screen shot below, the default item note text has been set up to show the quantity of items on the first line, the per unit cost on the second, and the extended cost on the third line.
Some Standard pages are dense with images so do not add more than 3 lines of text in the filed below.
Like all data in the System Preferences area, when you create an Overture presentation for a project this default text will be assigned to that presentation. But you can change this default text for each Overture presentation for more information click here.

The image below is a Detail page with one image. Below the image you can see where the Default Item Note Text will appear.

|