Before using the Gantt for the first time it is necessary to do a couple of steps so the chart will appear professional.
To begin:
| Step 1 | Go to System Preferences (for more information click here) |
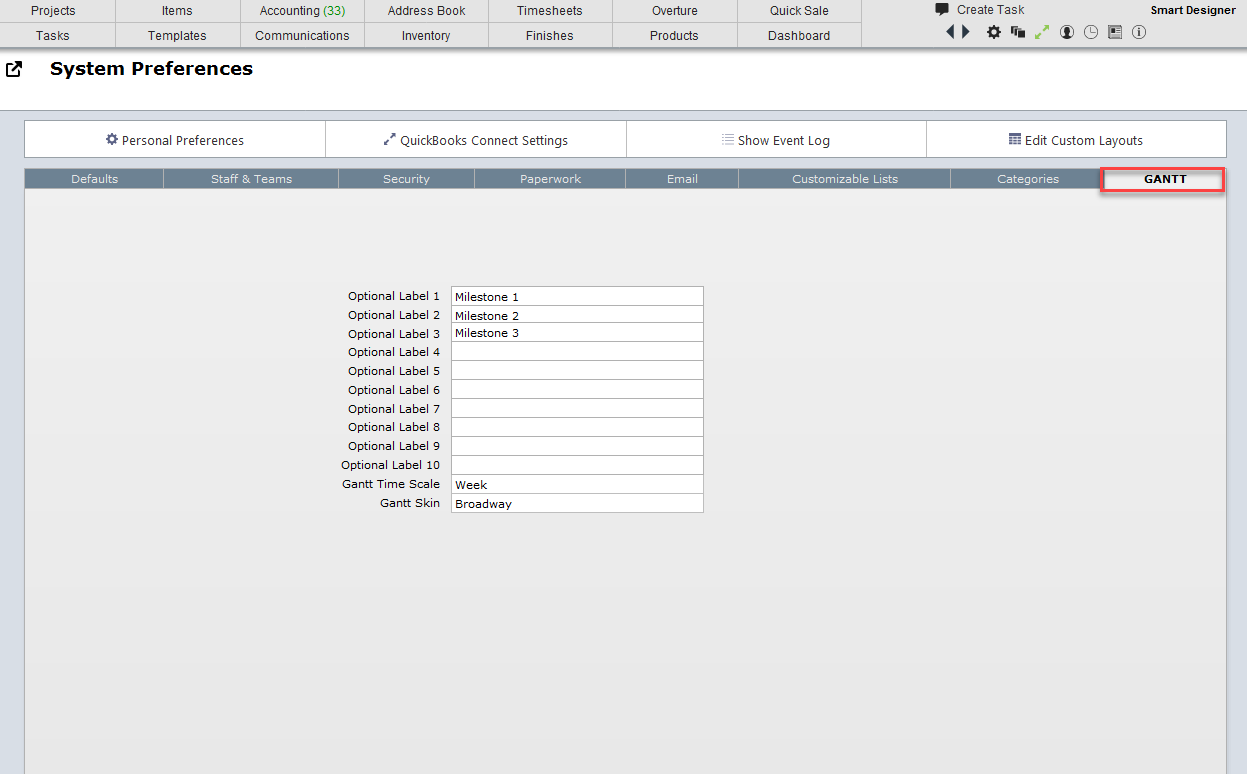
| Step 2 | Click on the Gantt tab |
| Step 3 | You can enter various optional labels. These labels will appear when you create a task on the Gantt chart. For example, for Optional Label 1 you might enter the word "Staff" so you can put in the name of the staff person. |
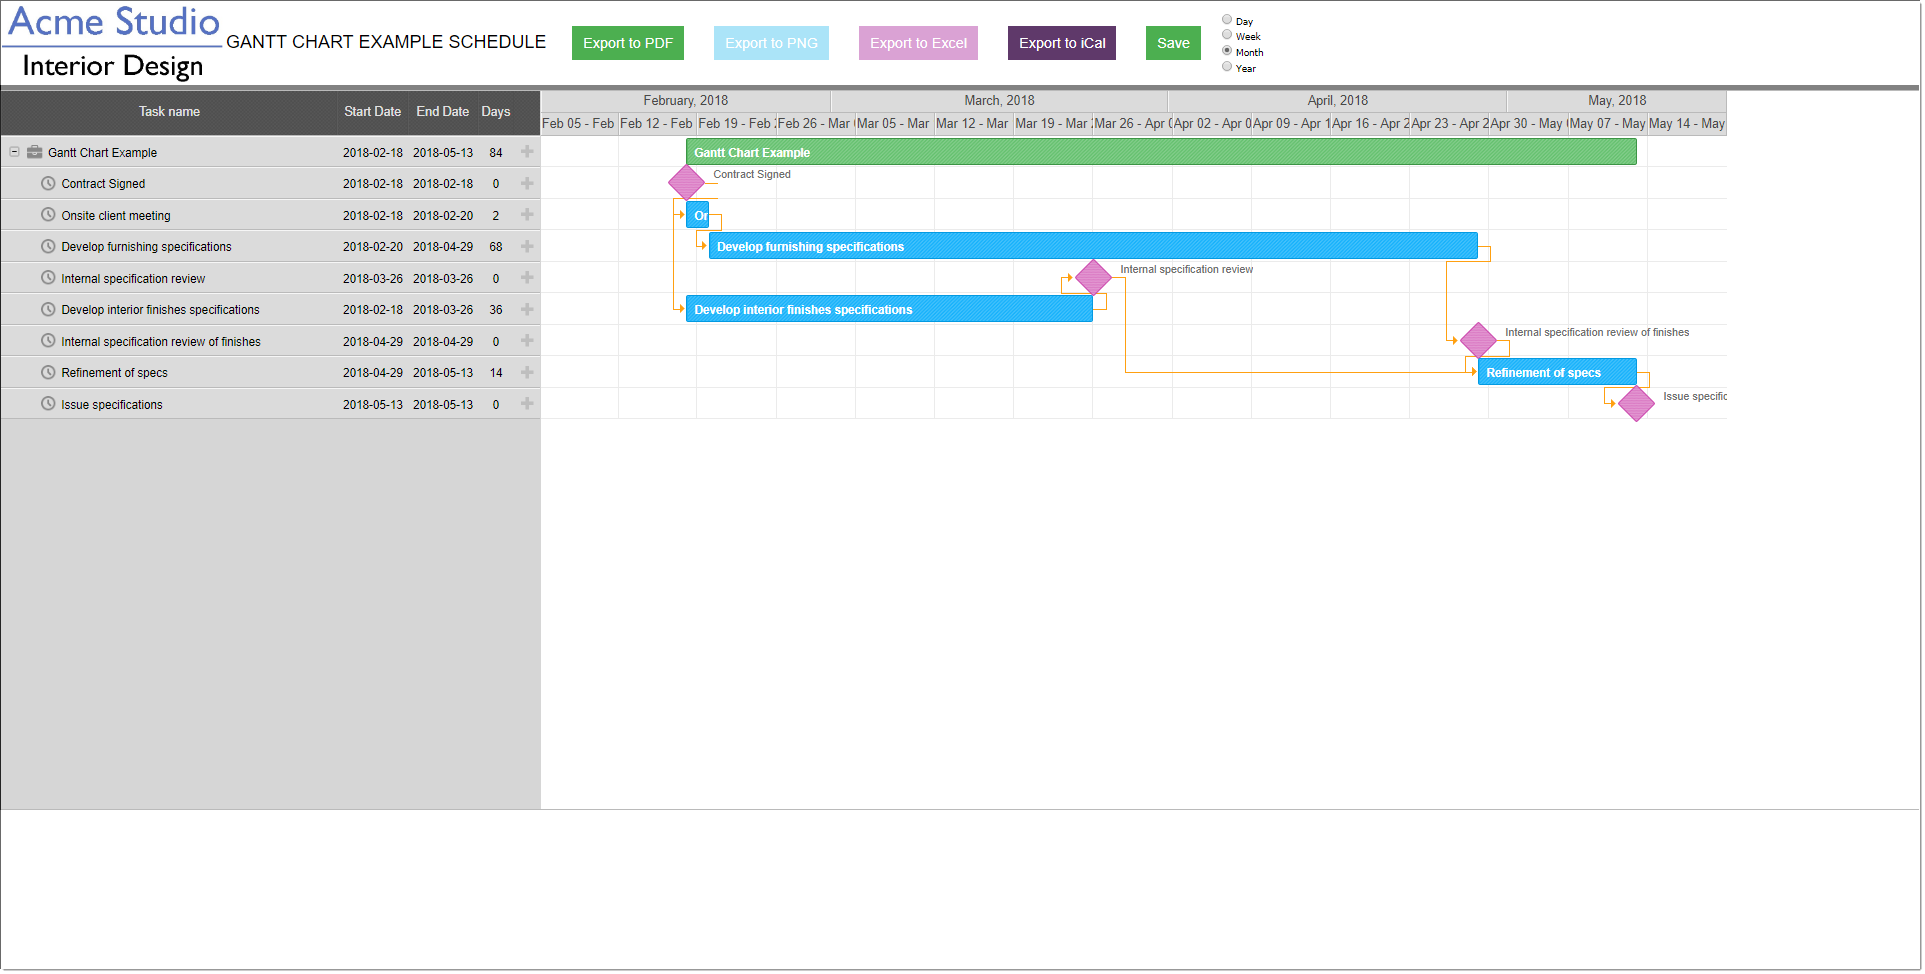
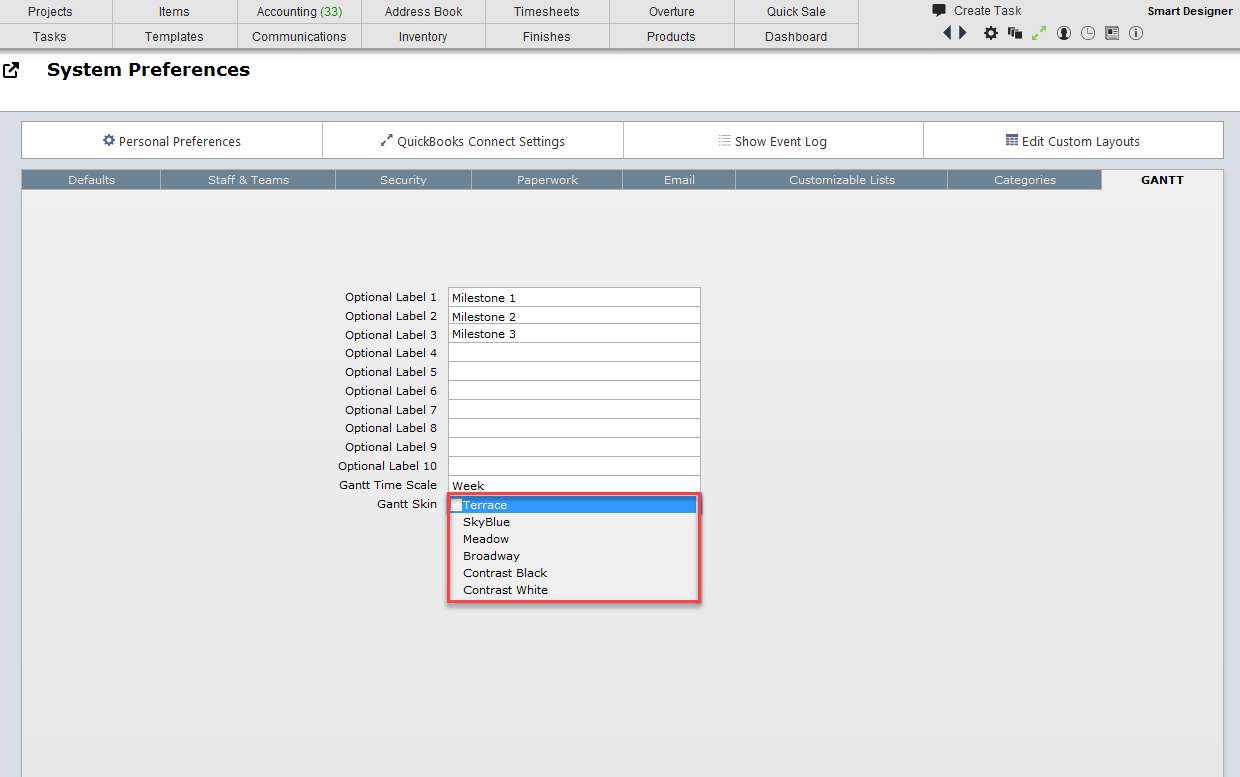
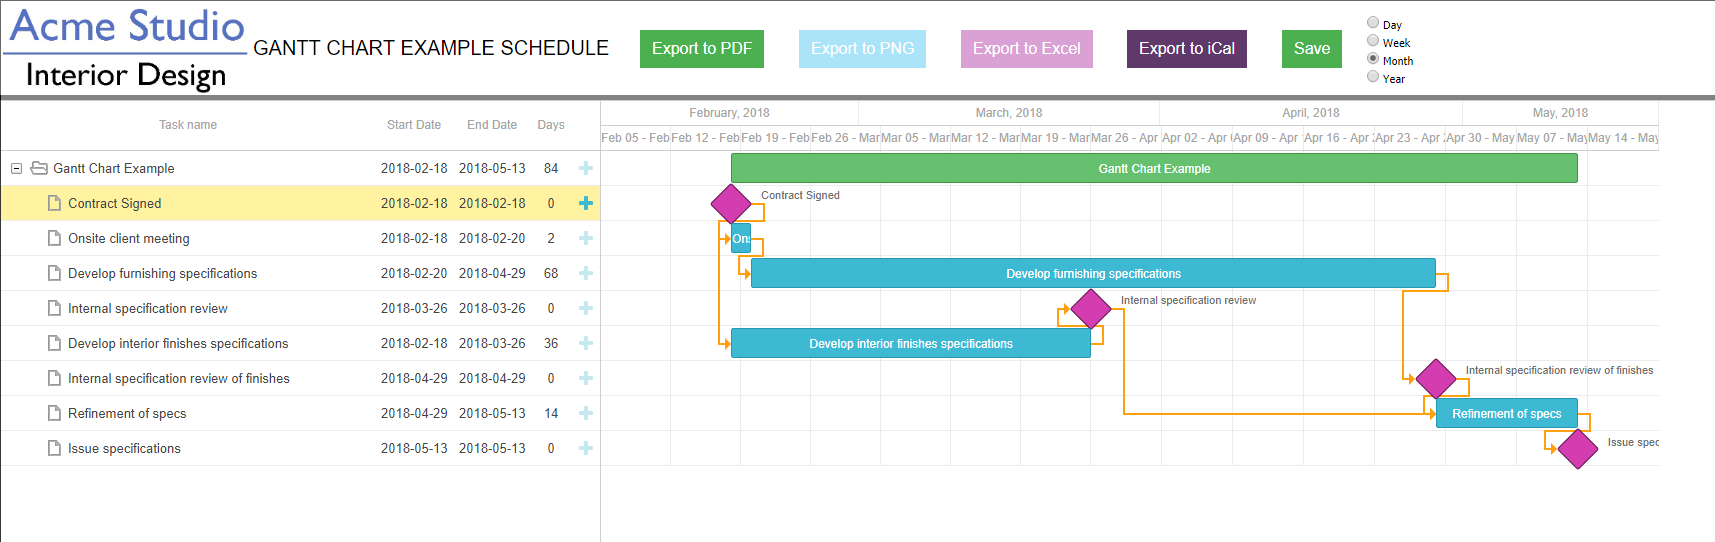
| Step 4 | Once you have developed your first Gantt, return to this tab and experiment with the various "Gantt Skins" or appearances. See examples below. |
Terrace Skin
Sky Blue Skin

Meadow Skin
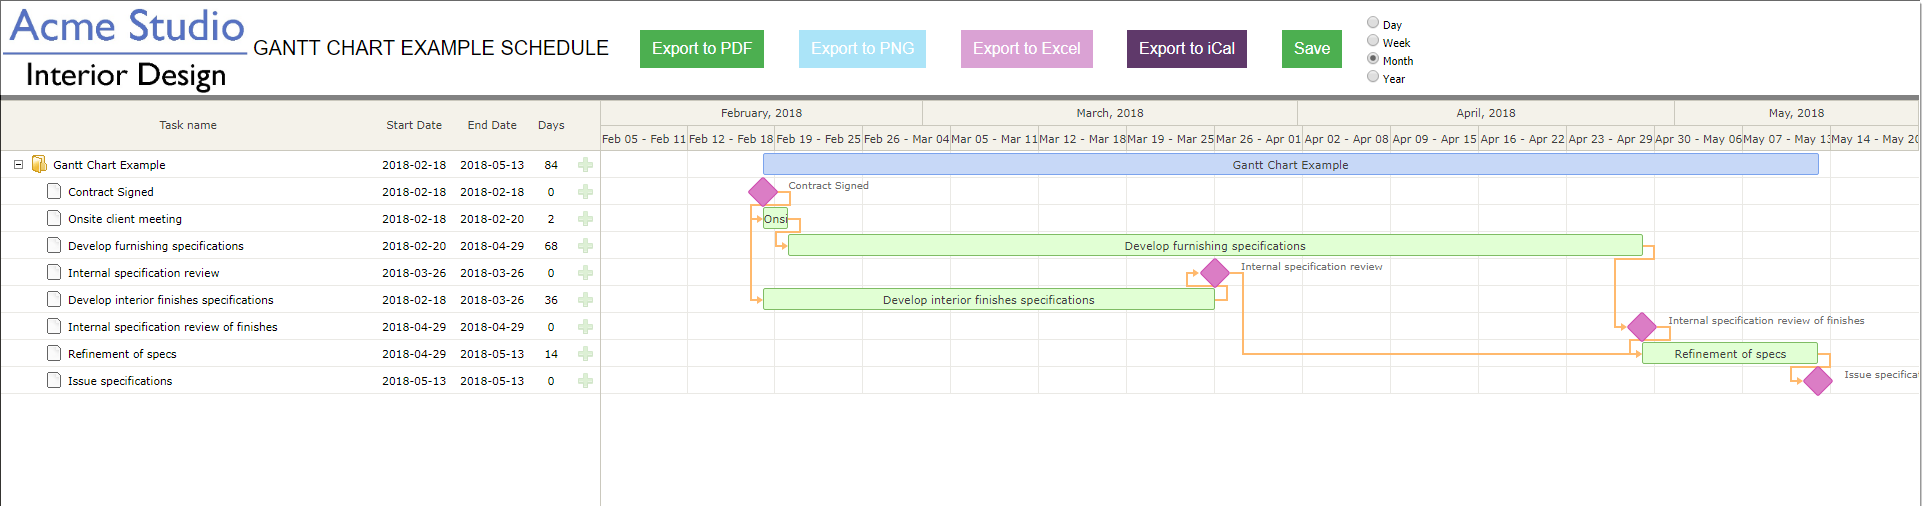
Broadway Skin