|
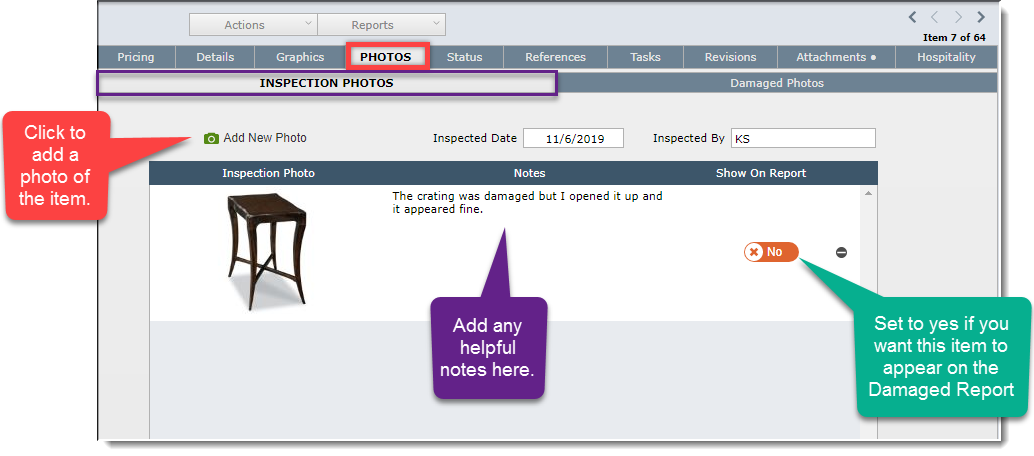
Sometimes it can be helpful to record photos of items when they have arrived and prior to installation. To get these photos into DesignSmart follow these steps:
| Normally any camera on a smart phone is good enough to use for these photos. |
| Step 2 | Go to the Item Detail View |
| Within DesignSmart, go to the Item Detail View for the item(s) inspected |
| Click on the Photos tab, then on the Inspections Photos tab. |
| Step 3 | Click the Add New Photo button |
| Drag and drop the image from your phone to this popover. It might be necessary to upload these photos to your drive before you complete this step. |
| Step 4 | Enter Additional information |
| In the Inspected Date, Inspected By and the Notes field, fill in the information as needed. |
| Step 5 | Flag "Show on Report" |
| You can indicate if you want this image to appear on the Damaged Goods report. If the item is damaged, you will normally add the picture to the "Damaged Photos" tab, but this switch allows you to have additional photos such as the damaged packaging materials. |

|
