Why Select Items?
| The reason designers will select items is because when one runs a report or an action (such as creating a purchase order), if any items are selected then only those selected items will be included in the report or the action. |
| For example, in the screen shot below Items 4, 5, and 6 have been selected. A possible reason for this is that the user wants to create in invoice with just these item. Or they want to do the action of "Flag to Invoice". Selecting items gives you the ability to have more control over what appears on reports or is acted on. |
| For more information about the impact of selections and reports click: How Reports Work. Actions work the same way as reports in terms of how selections work. You can read more about how actions work here: How Actions Work. |
Selecting Items
| On the Item List View you can select items by clicking on the Select button located to the left of the item number. |
| Items that are selected will be highlighted in green. |
| You can select items individually or you can select a range of items. Click here for more information. |
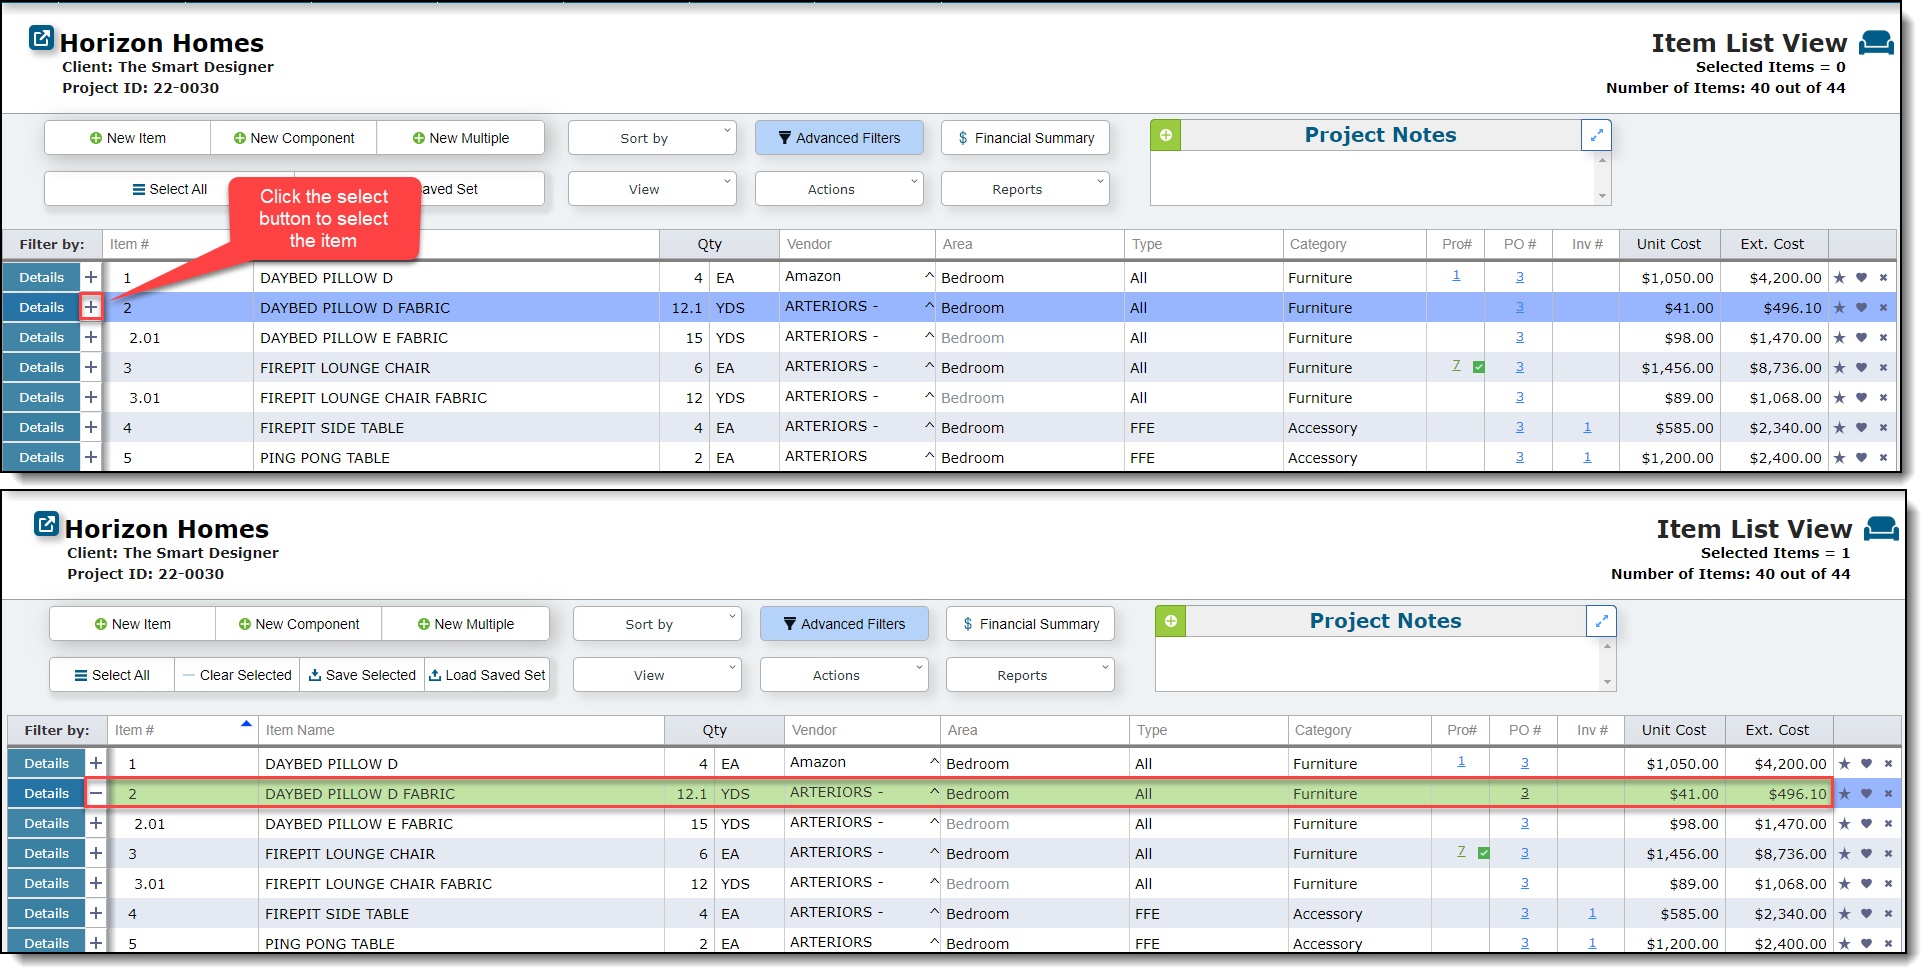
Click on the minus sign (-) to deselect the item.
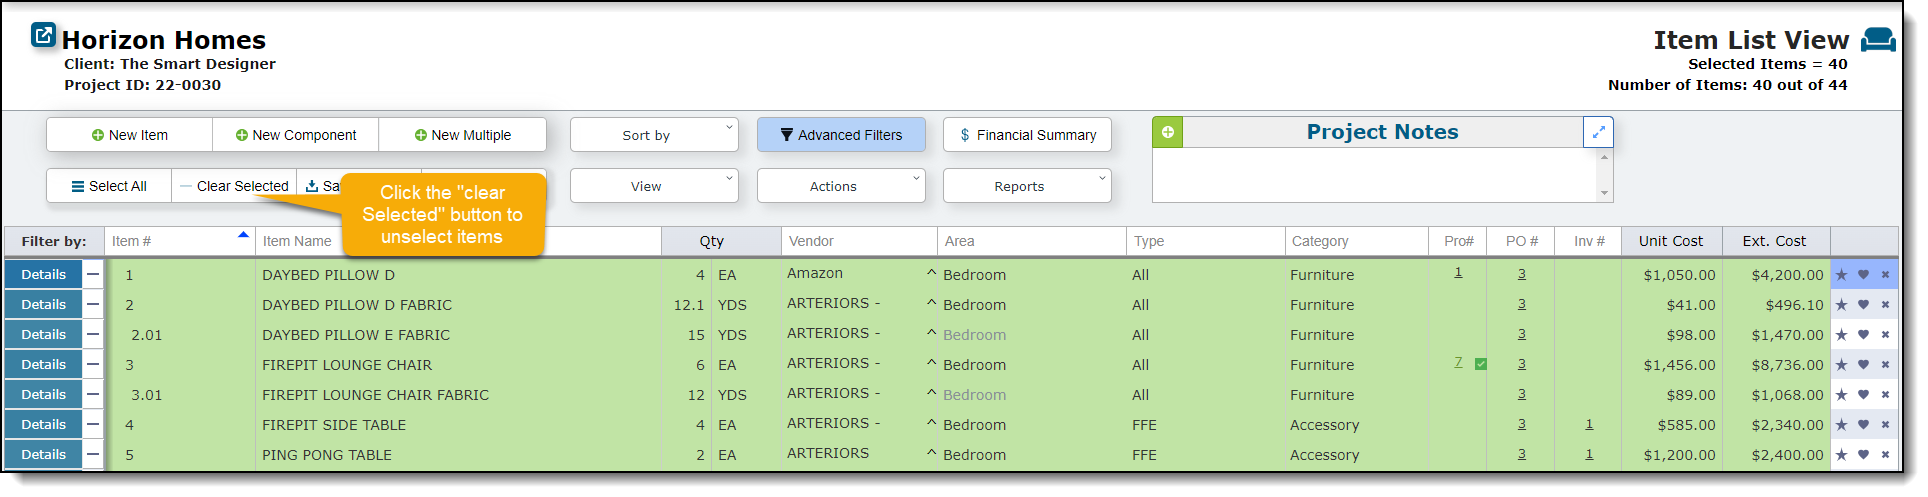
Selecting All Items
| On the Item List View you can select items by clicking on the Select button located to the left of the item number. |

Unselecting Items
Items can be "unselected" by clicking on the - button for items that are selected and it will act as a toggle to select and unselect.
You can also click the "Clear Selected" button to unselect all items.
|