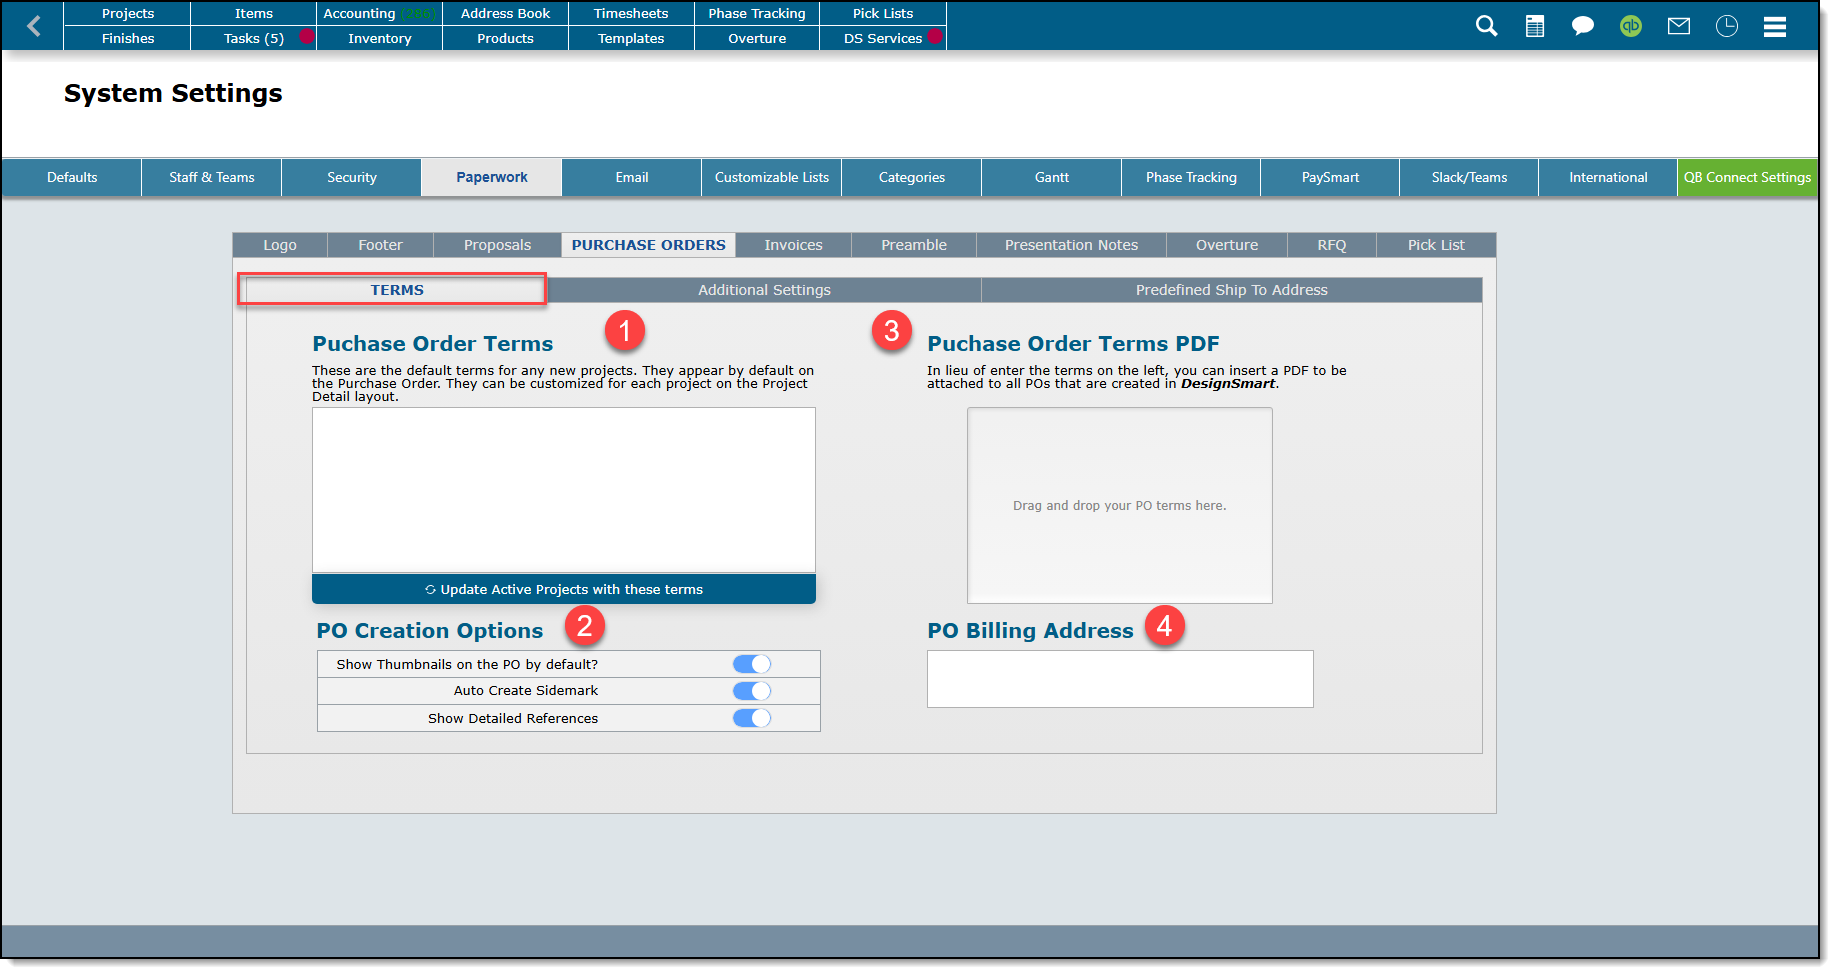
The Purchase Orders sub-tab is where you can enter the following information:
| 1. Purchase Order Terms | These terms will be copied to new projects and can be edited at the project level. These terms will appear on the PO. |
| 2. PO Creation Options | Turn on the Show Thumbnails on the PO by default? switch if you want the thumbnail images to appear by default when you create a PO. When you preview a PO you will have the option to show or hide images. |
| We recommend that you turn on the Auto Create Sidemark switch. You will have the ability to indicate what information you want on the sidemark in the Additional Settings tab just to the left of this tabe. |
| If you want the component details to appear on the PO for the primary item, then turn on the Show Detailed References switch. |
| 3. Purchase Order Terms PDF | On occasions, firms would have pages long purchase order terms, they can create a PDF of those terms and drag and drop that PDF here. This PDF will then be attached to every purchase created in the system. |
| 4. PO Billing Address | In this area you will be able to add a default billing address for all of your purchase orders in the system. This field is optional. If left blank, the vendor will see your firm's address in the footer of the purchase order. |
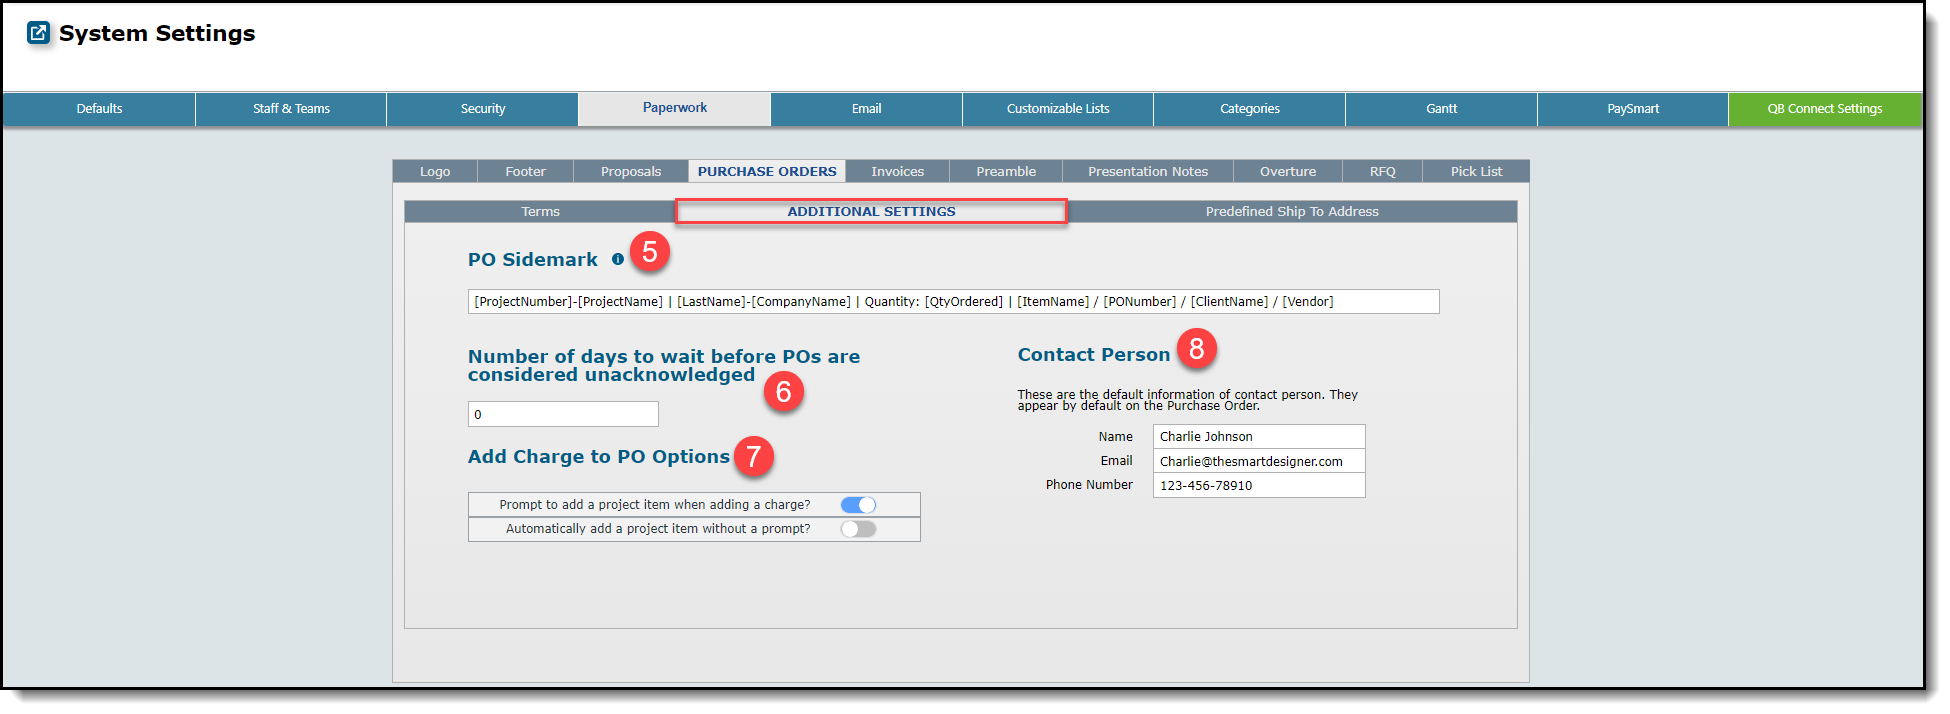
| 5. PO Sidemarks | You will now be able to create your own Sidemark with the use of merge fields provided for you. You can access these by clicking the |
| 6. Show Detailed References | When turned on this will automatically include the attributes for Component items on POs. For more information click here. |
| 7. Delay | Enter the number of days DesignSmart should delay before showing you purchase orders that have not been acknowledged. For example, if you send a PO on a Monday and you want to give the vendor 3 days to acknowledged the PO before you are reminded to follow up on the PO, then enter 3 days here. |
| 8. Adding items from POs | Click Yes if you want to be prompted when you add a charge to a PO. The prompt will ask you if you want to add a item to the project for this charge. If you respond Yes, then an item will be added. This is used by some firms to ensure that all of their additional charges are eventually invoiced. For more information, please click here. |
| 9. Automatically add items from POs | If you want to add PO charges to the project items automatically. This means you will not be prompted each time you add a charge to a PO and it will automatically be added as an item. |
| 10. Contact Person | Use this option whenever you would like any staff member to send emails from the system but would only like for one person's contact information to be shown on the purchase order. Type in that person's contact information here. |
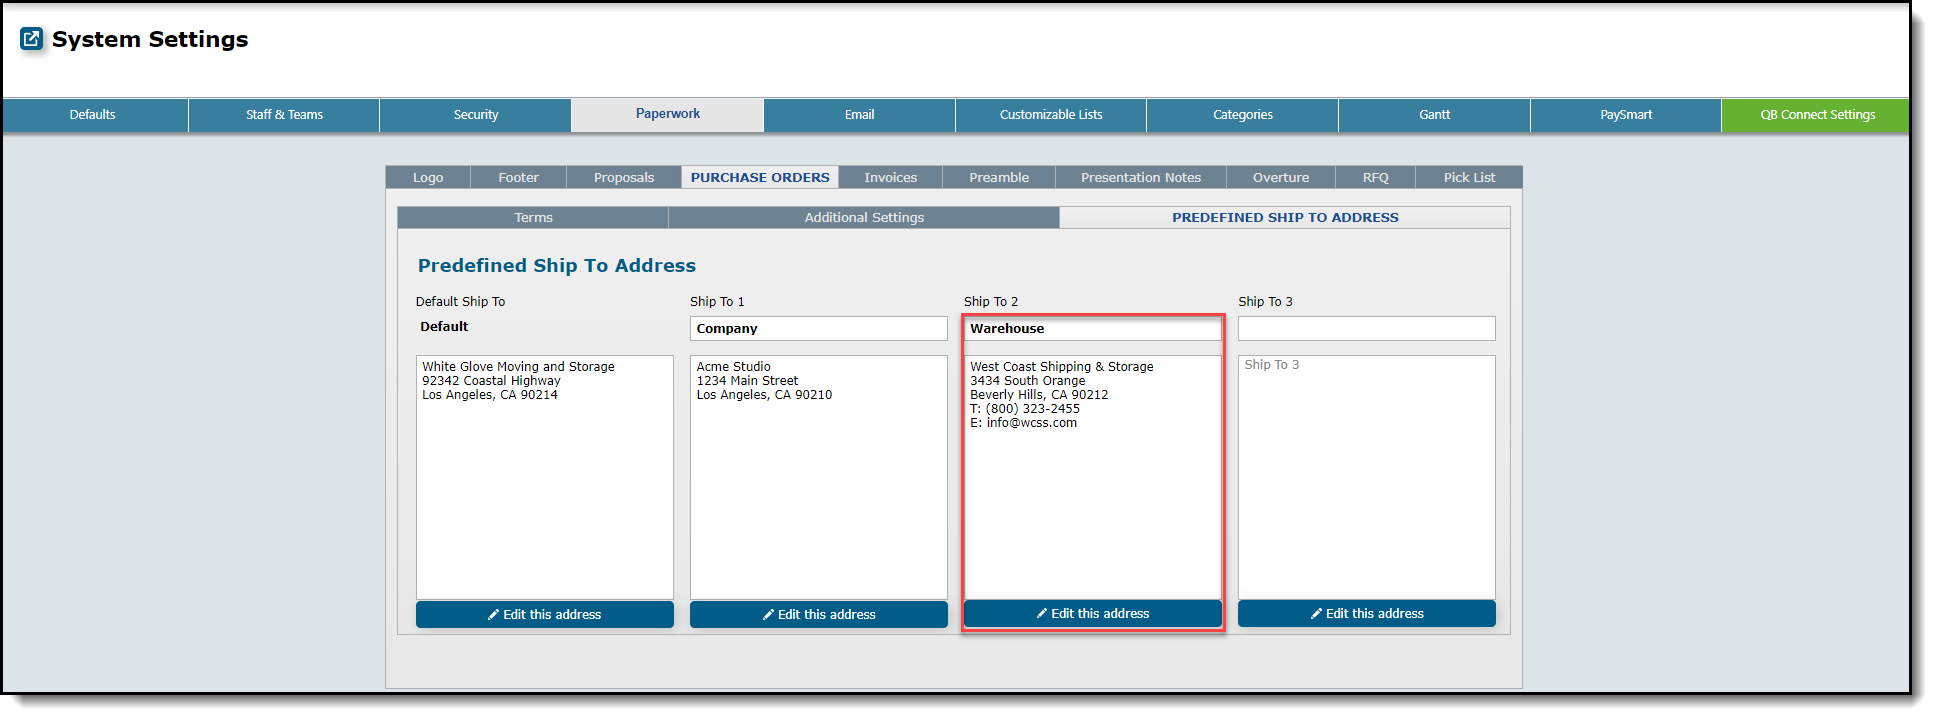
Predefined Ship to Address Tab
On this tab you will be able to set up your company's predefined ship to addresses which will be added to your projects upon creation. Follow the steps below to add a new predefined address to your System Settings.
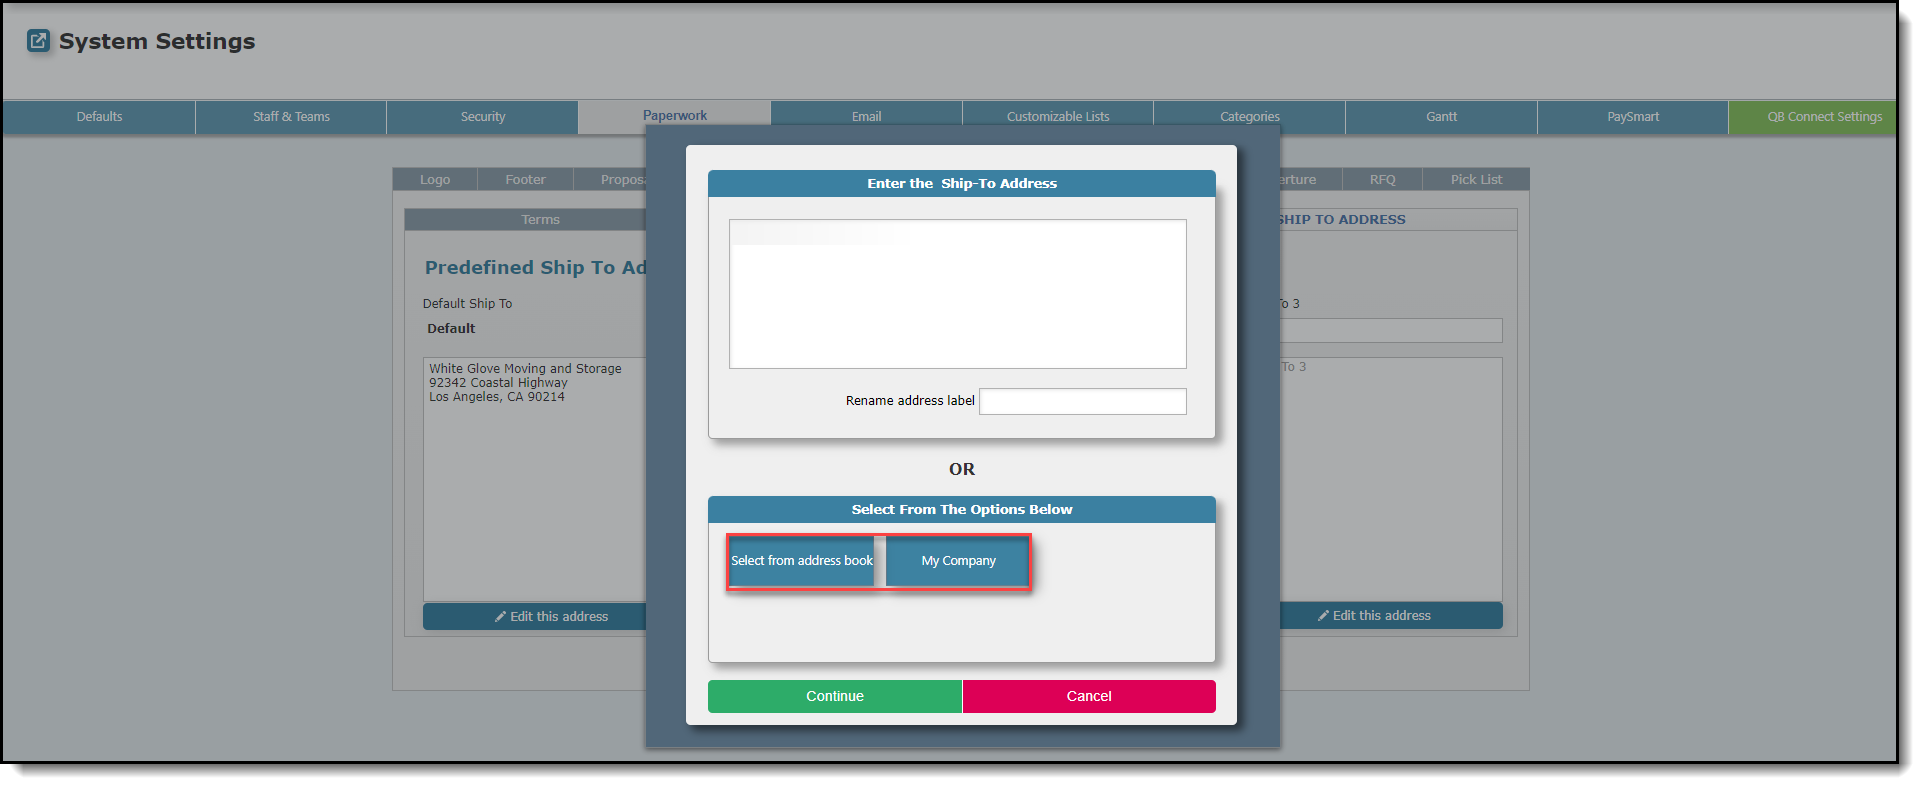
1. Click the Edit this address button to add a ship to address to Ship to 2.
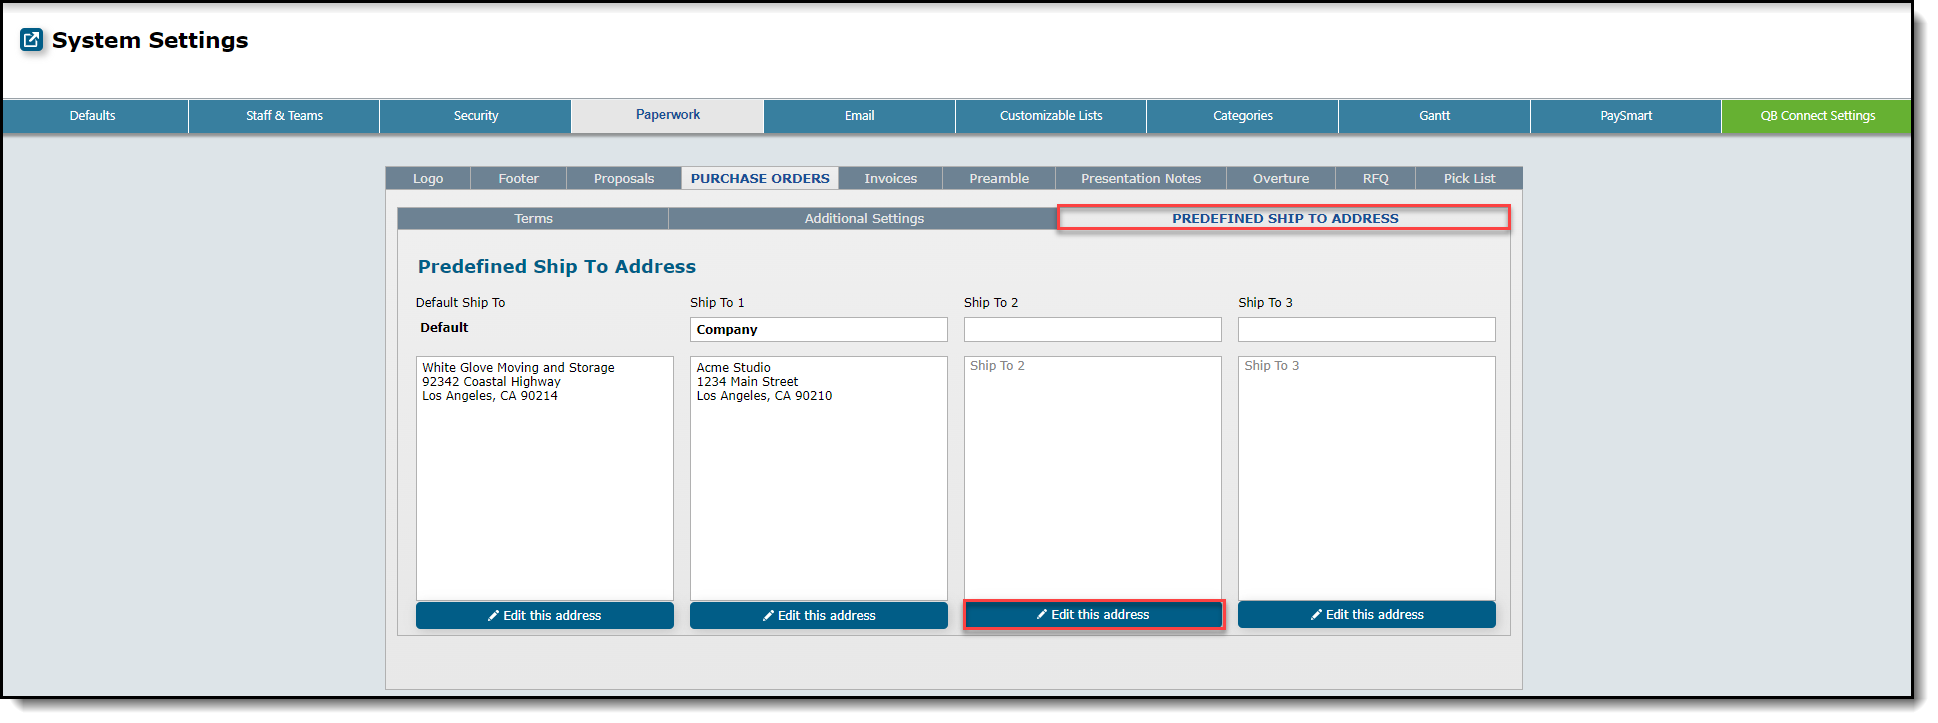
2. Click the Company button to insert the company's address as your Ship to 2. Clicking the Select from Address Book button will bring up your address book allowing you to select an address from there.
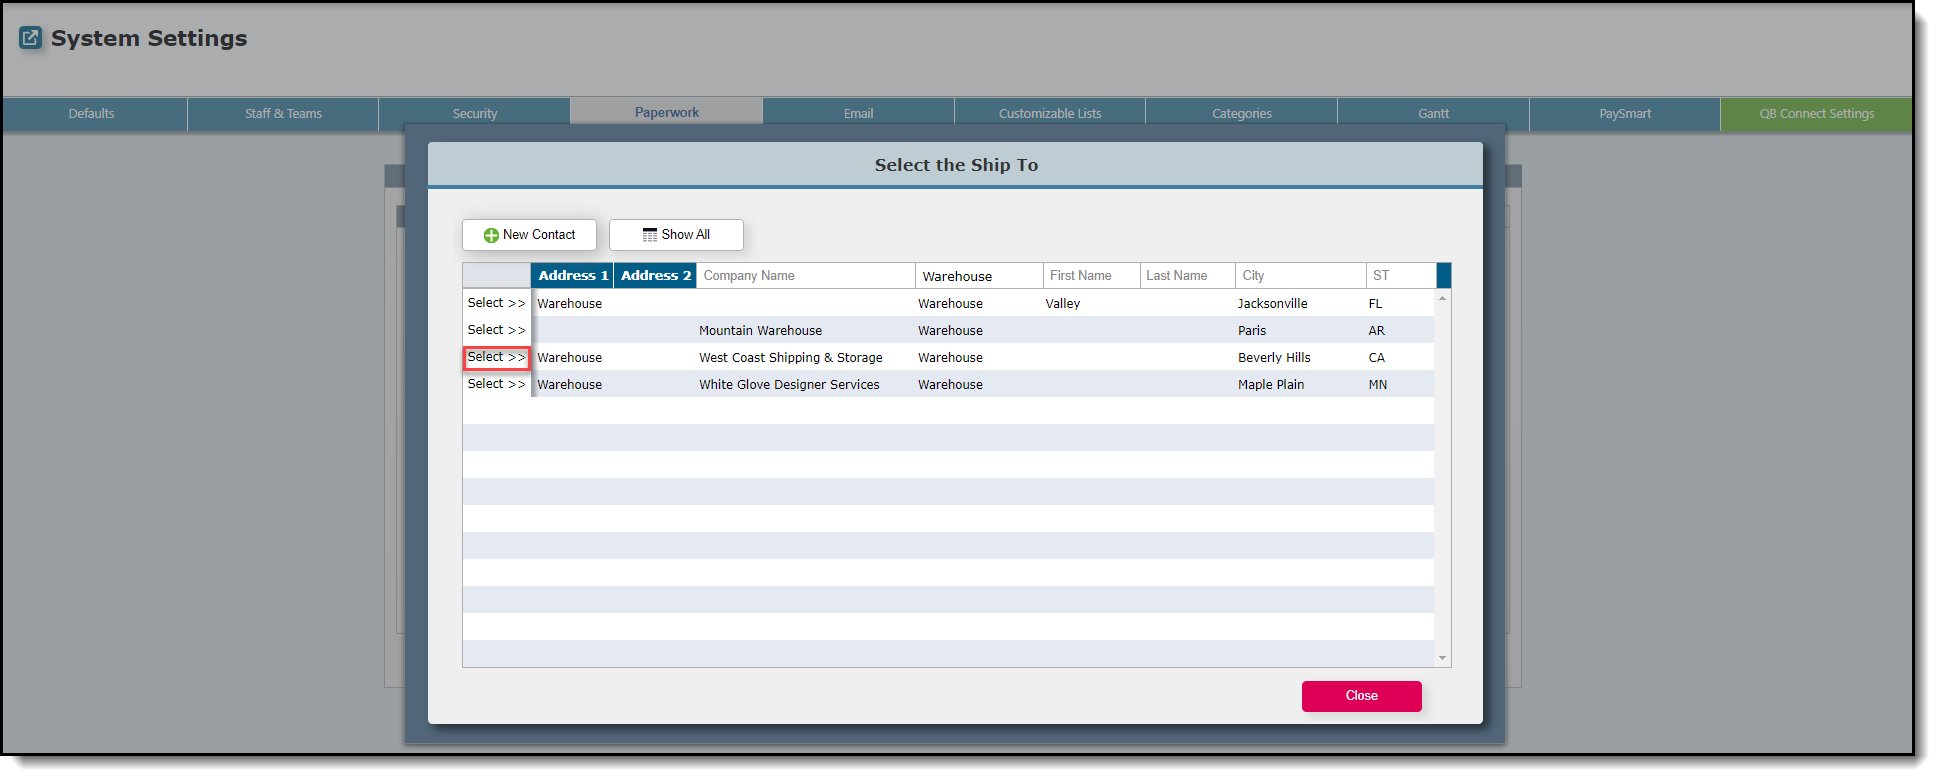
Select your desired address for Ship to 2.