Personal Preferences
In this part of the system you can set your own personal preferences. For example you can indicate that you want your default items view to be "List View with Images" or the "Split View". If you are responsible for purchasing, you might set your default Sort to be by vendor. Read through the information below so you know how to use these preferences to make working with DesignSmart as efficient as possible.
How to Get To Personal Preferences
To get to Personal Preferences, click on the hamburger icon in the top right of most pages, then on Personal Settings.
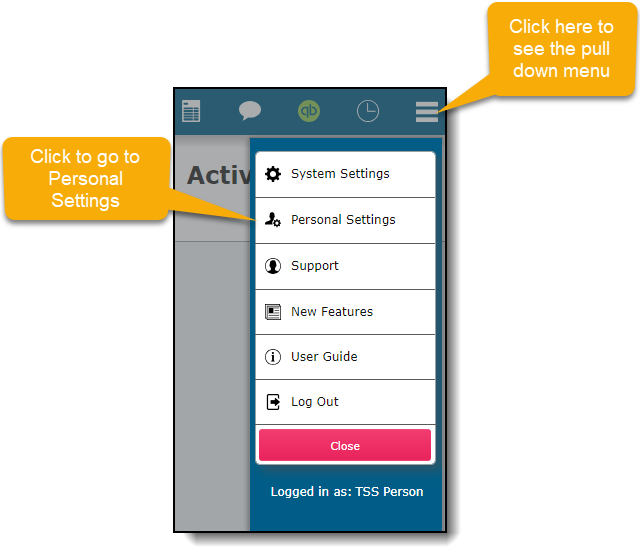
After clicking Personal Settings, you will see this card pop up.

Personal Preference Settings
In this part of the system you can set your own personal preferences. For example you can indicate that you want your default items view to be "List View with Images" or the "Split View". If you are responsible for purchasing, you might set your default Sort to be by vendor. Read through the information below so you know how to use these preferences to make working with DesignSmart as efficient as possible.
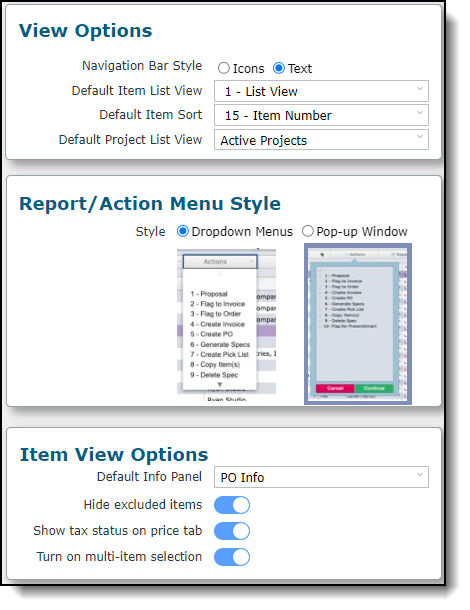
View Options
| 1. Defaults List View | You can set your preferred "List View" when you click on Items in the menu bar. This is a feature you will want to come back and explore as you get to learn the system more. |
| 2. Default Item Sort | This will set how the items are sorted when you click on the Items in the menu bard. Most people will leave this set to Item Number. Persons who work exclusively in purchasing will opt to set this to Vendor. |
| 3. Default Project List View | This option will allow you to select the view you would like to see when you log into DesignSmart. This will determine the view your projects will be listed on. |
| 4. Navigation Bar Style | Use this to show either icons for the menu bar in DesignSmart or to use text in the menu bar. |
 |
Item View Options
| 1. Hide excluded items | This allows you to indicate if you want to view or not view the "excluded" items when you click on the Items in the menu bar. Excluded items are denoted in red strike-through text. |
| 2. Show tax statues on price tab | This allows you to see what merchandise, markups and subcharges are being taxed on the Item Detail View when viewing the pricing tab. |
| 3. Turn on multi-item selection | Setting this to Yes allows you to select a range of items on the Items List View. For information how to use this feature, click here. |
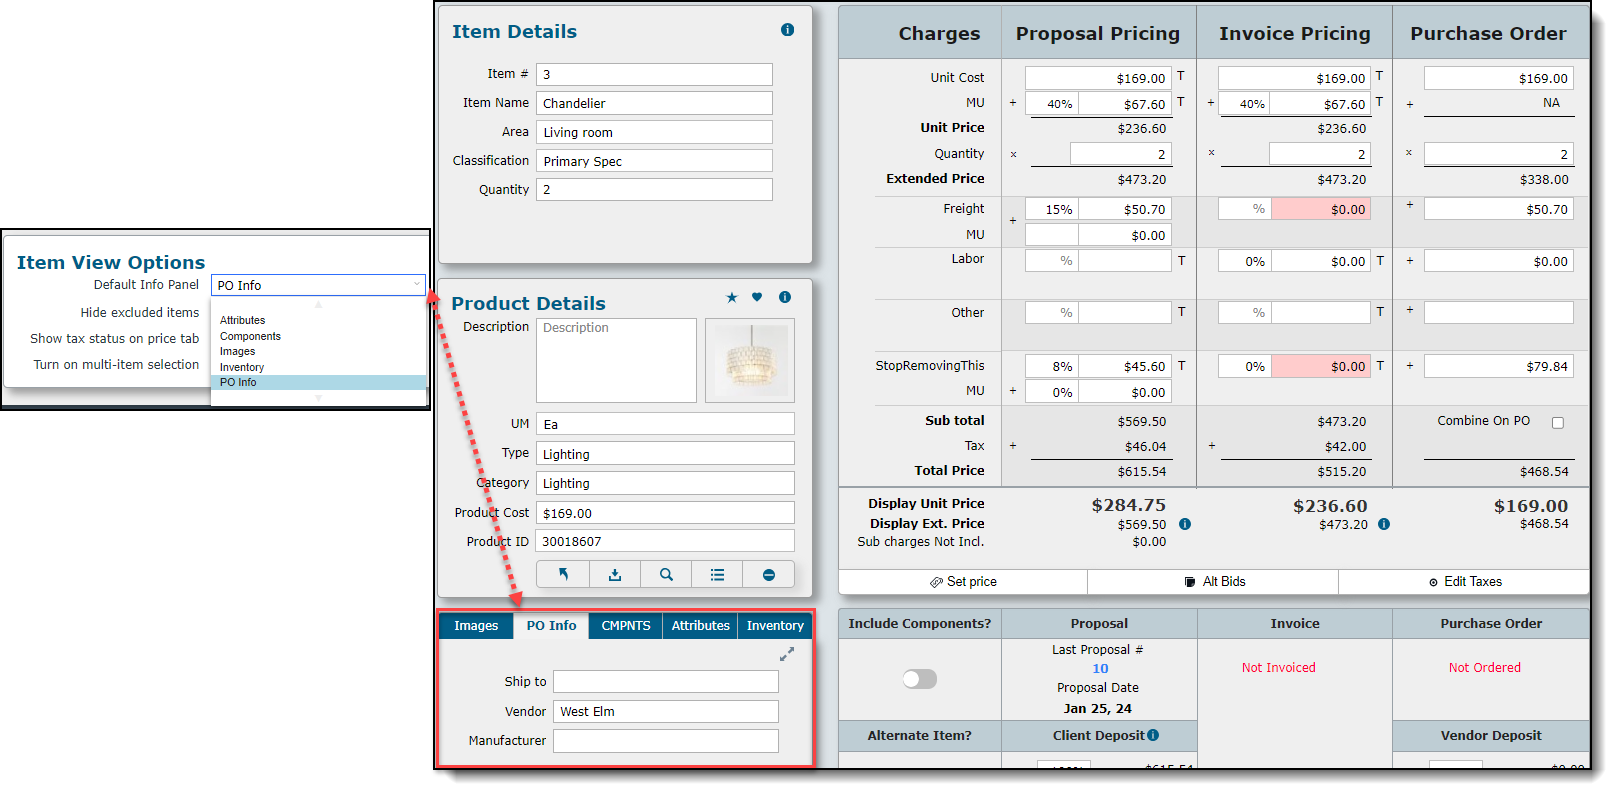
| 4. Default Info Panel | Select the information you would like to be visible when you view the item details of an item. |
 |
Report/Action Menu Style
| 1. Style | Here you can select the menu type that will appear on the Item List Views and the Item Detail for for the Report and Actions menus. Most persons who use a browser will opt for the "Pop-up Window" choice while those who use FileMaker Pro might prefer the "Dropdown menus" options. It is best to test each option to determine your preference. |
Miscellaneous Options
1. Session Restoration If this switch is on (blue), then when you log into DesignSmart, you will be asked if you want to return to the screen you were last on when you exited the program.
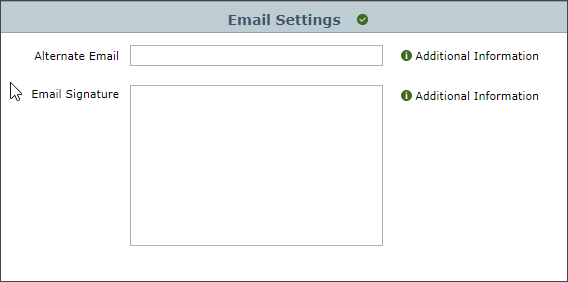
Email Settings
Please refer to the screen shot below.
| 1. Alternate Email | Only fill this when instructed to by your System Administrator. You will be told to enter your Gmail or other email address. |
| 2. Enter your Email Signature | Add your email signature in the Email Signature box below. |
| It can only be text and cannot include any logos or font styling. |
| If your firm is configured to use individual emails, then you will see the "Test Sending Email" button that you can use to test to confirm if your email address is working correctly. |