Some design firms will want to create specific reports, called Schedules, for certain categories of materials. Most commonly they will want a Lighting Schedule, Plumbing Schedule, Casegoods Schedule.
You can easily create your own customized schedules and include the specific information that you want to include in each schedule!
Step 1 Go to the Categories tab in System Preferences. Only System Administrators have access to System Preferences.
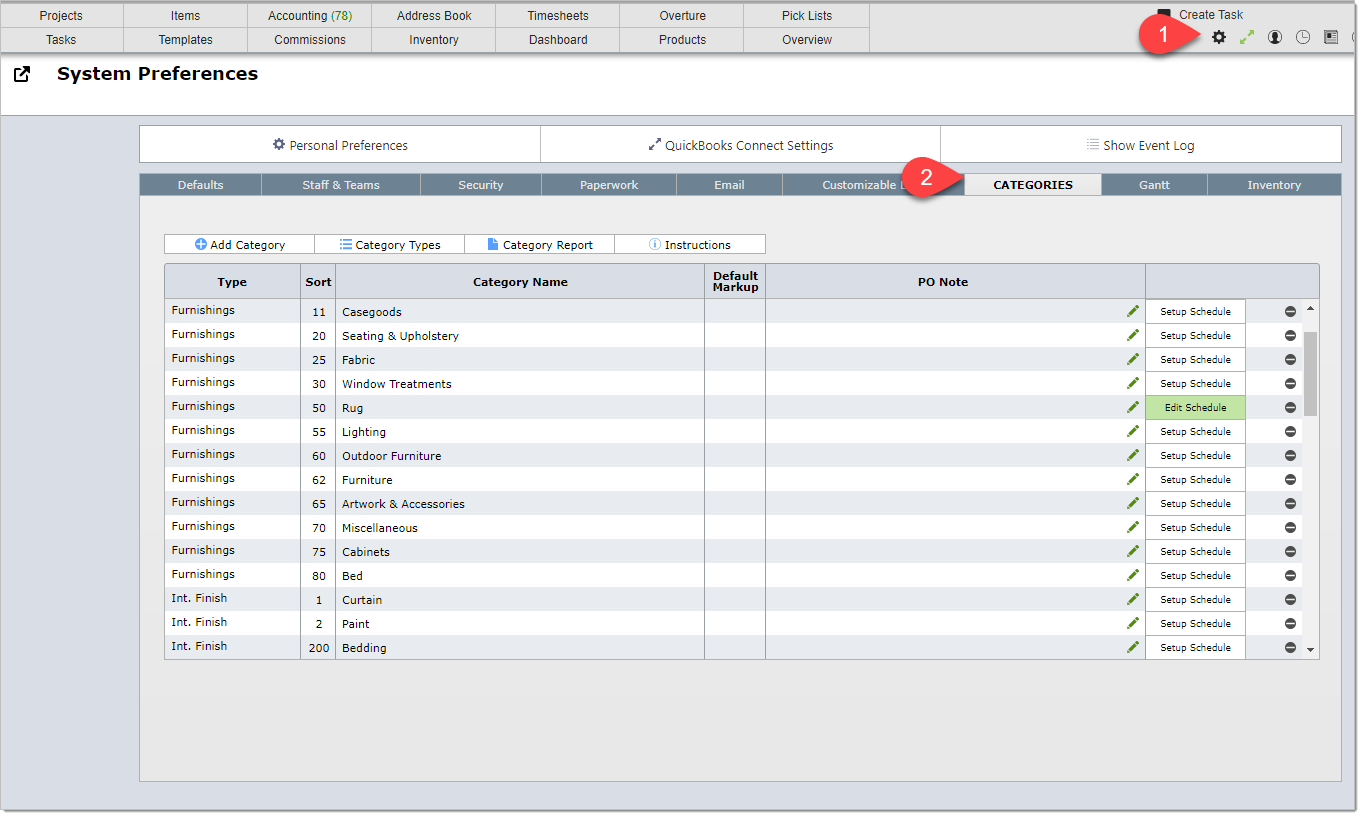
Step 2 Click on the button Setup Schedule to the right of the category you wish to set up.
If the category already has a schedule, click on the Edit Schedule button that will be highlighted in green.
For this example, Setup Schedule to the right of Lighting will be clicked.
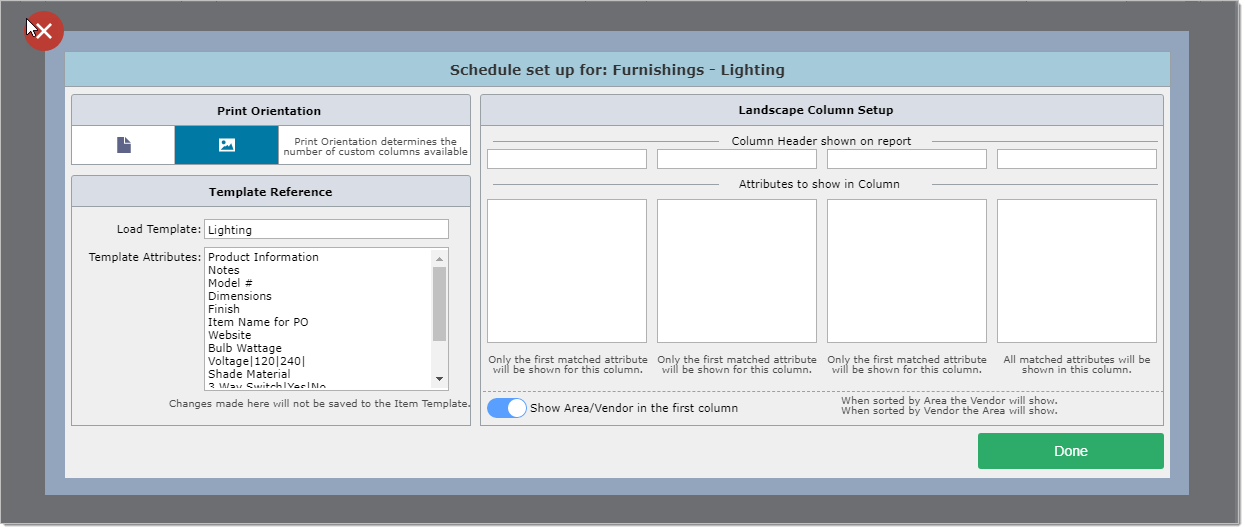
Step 3 Indicate if the schedule will be in portrait or landscape.
Portrait includes 3 narrow columns you can customize. Landscape provides 4 slightly wider columns.
Step 4 Select, or load, a template.
A schedule can use attributes from more than template.
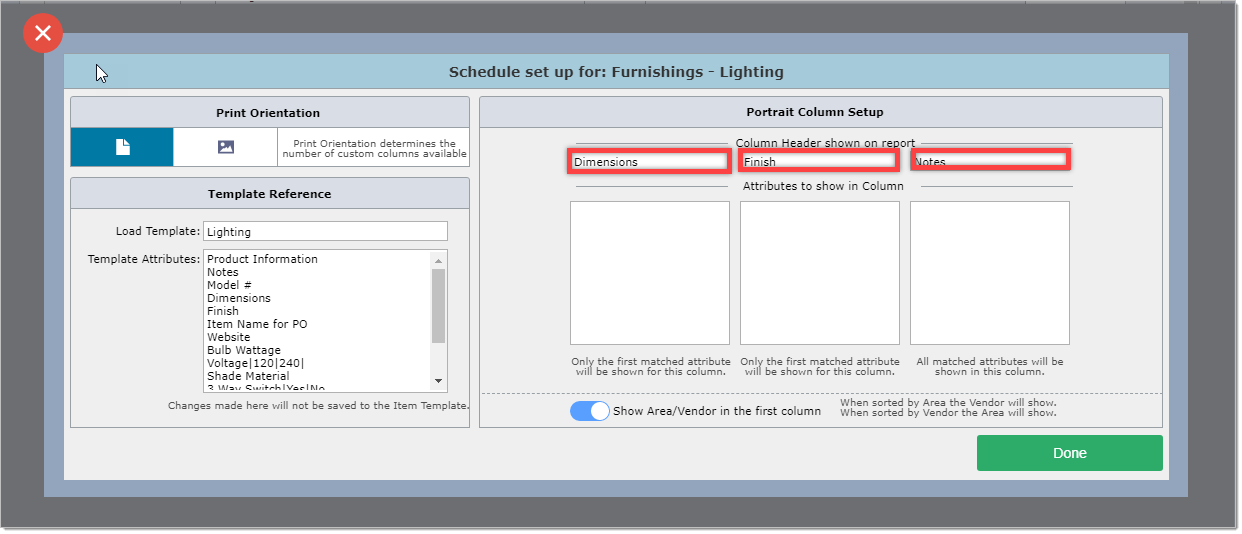
Step 6 Enter the headings for the columns
Important: Item Number, Item Name, Quantity and Unit of Measure will appear as the first columns on all schedules.
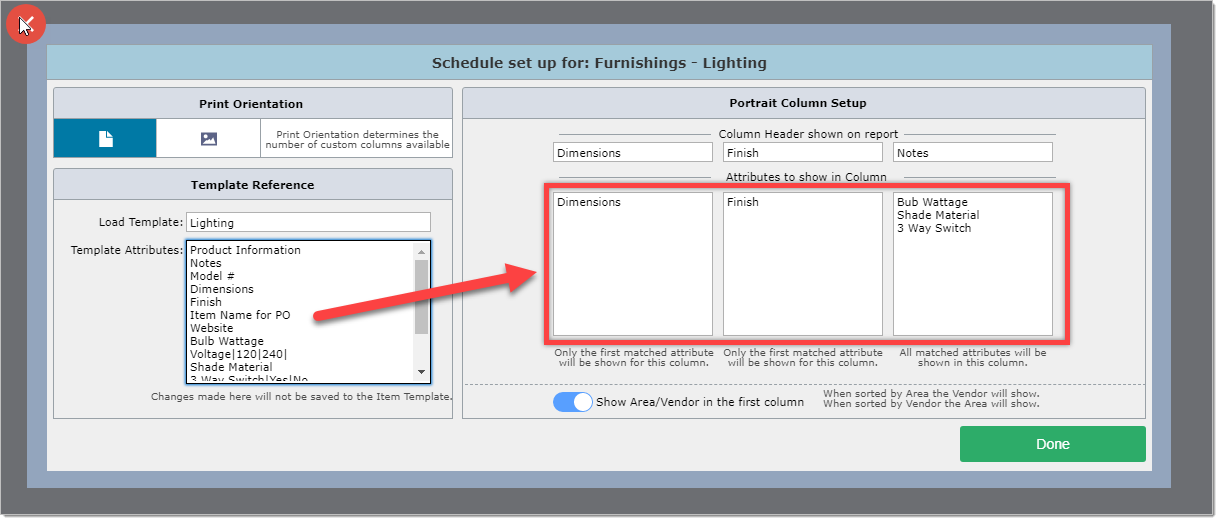
Step 7 For each column, enter the attribute name into the appropriate column on the right.
Important: the last column on the right can have multiple attributes.
Step 8 Click the this switch only if you want both the Area and the Vendor in the schedule.
Important: if you turn on this switch you the first column on the left will NOT appear. The reason for this is that it will be replaced by Area or Vendor.
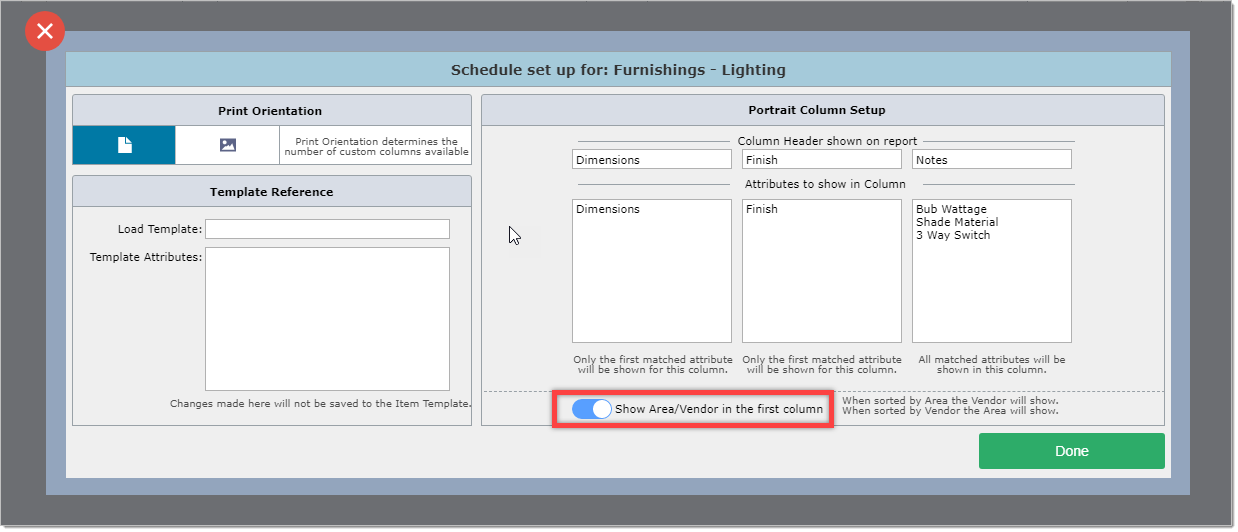
Step 9 Click the Done button.