Creating invoices follows the same rules as selecting any action in DesignSmart. If you haven't read the section How Actions Work, please do so now.
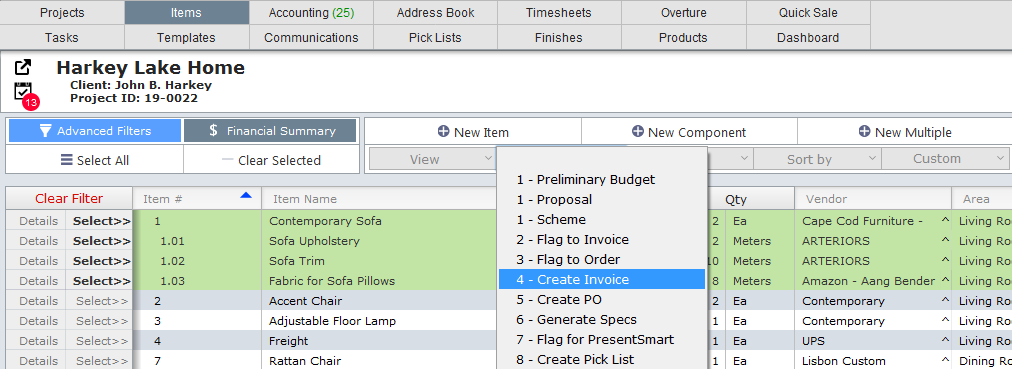
To create invoices start on the Items List View as seen below, then, following the rules of How Actions Work, select Create Invoice from the Actions Menu.


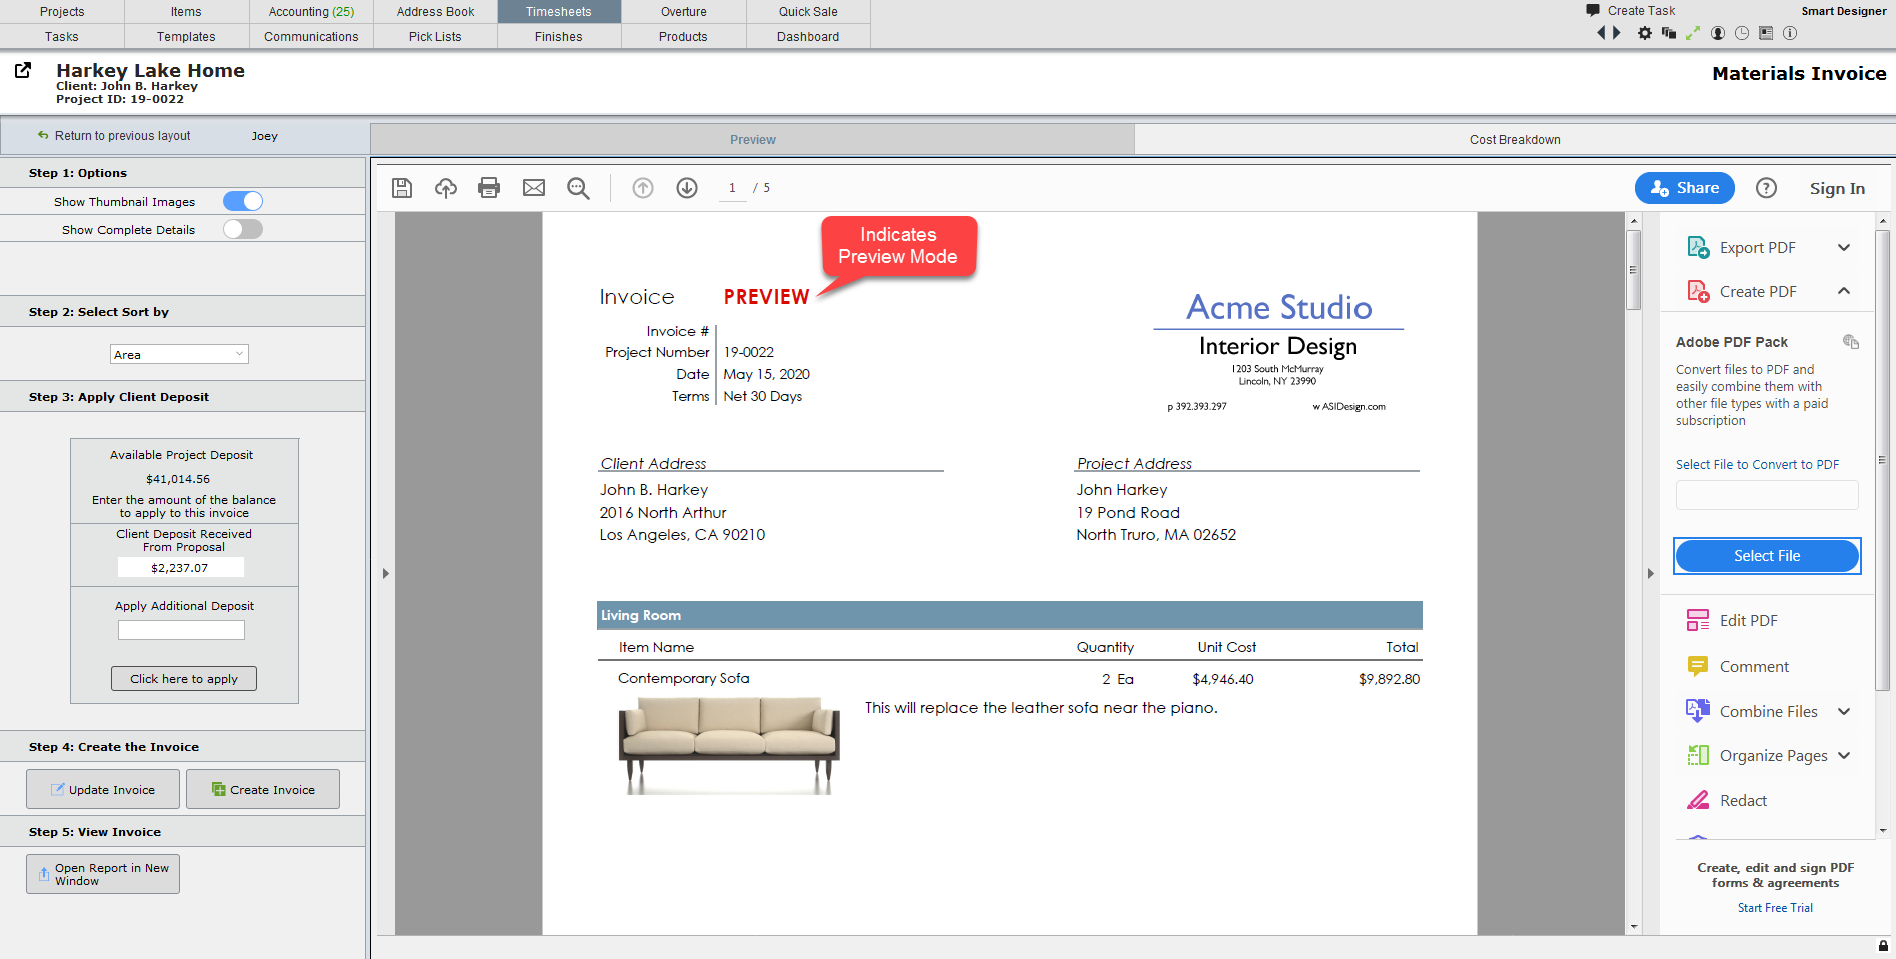
This will bring up the invoice in Preview mode. Note the word Preview in the top right of the image below.

What you can do on this layout:
Step 1
1. Show Thumbnail Images To the right of Show Images on the top left under Options, click if you want to include images or not.
2. Show Complete Detail To the right of Show Detail on the top left under Options, click if you want to include the item details on the invoice.
Step 2
1. Sort By Ability to sort the invoice by Area, Category or Vendor
Step 3
1. Apply Additional Deposit When you create an invoice, DesignSmart will automatically calculate the appropriate amount from the Client Deposit balance to apply to this
invoice. But there are times when you will want to increase this amount.
For example, if this is the last invoice for the project, you will want to apply the full remaining balance to this invoice. Or if the client has paid
a deposit for items that have since been canceled, you could apply that deposit amount to an invoice.
Step 4
1. Update Invoice You must click the Update Invoice button to see the changes you make in the Options section.
2. Update Invoice When ready to create the invoice, click the Create Invoice button.
Step 5
1. View Report Open and view the report in a new window
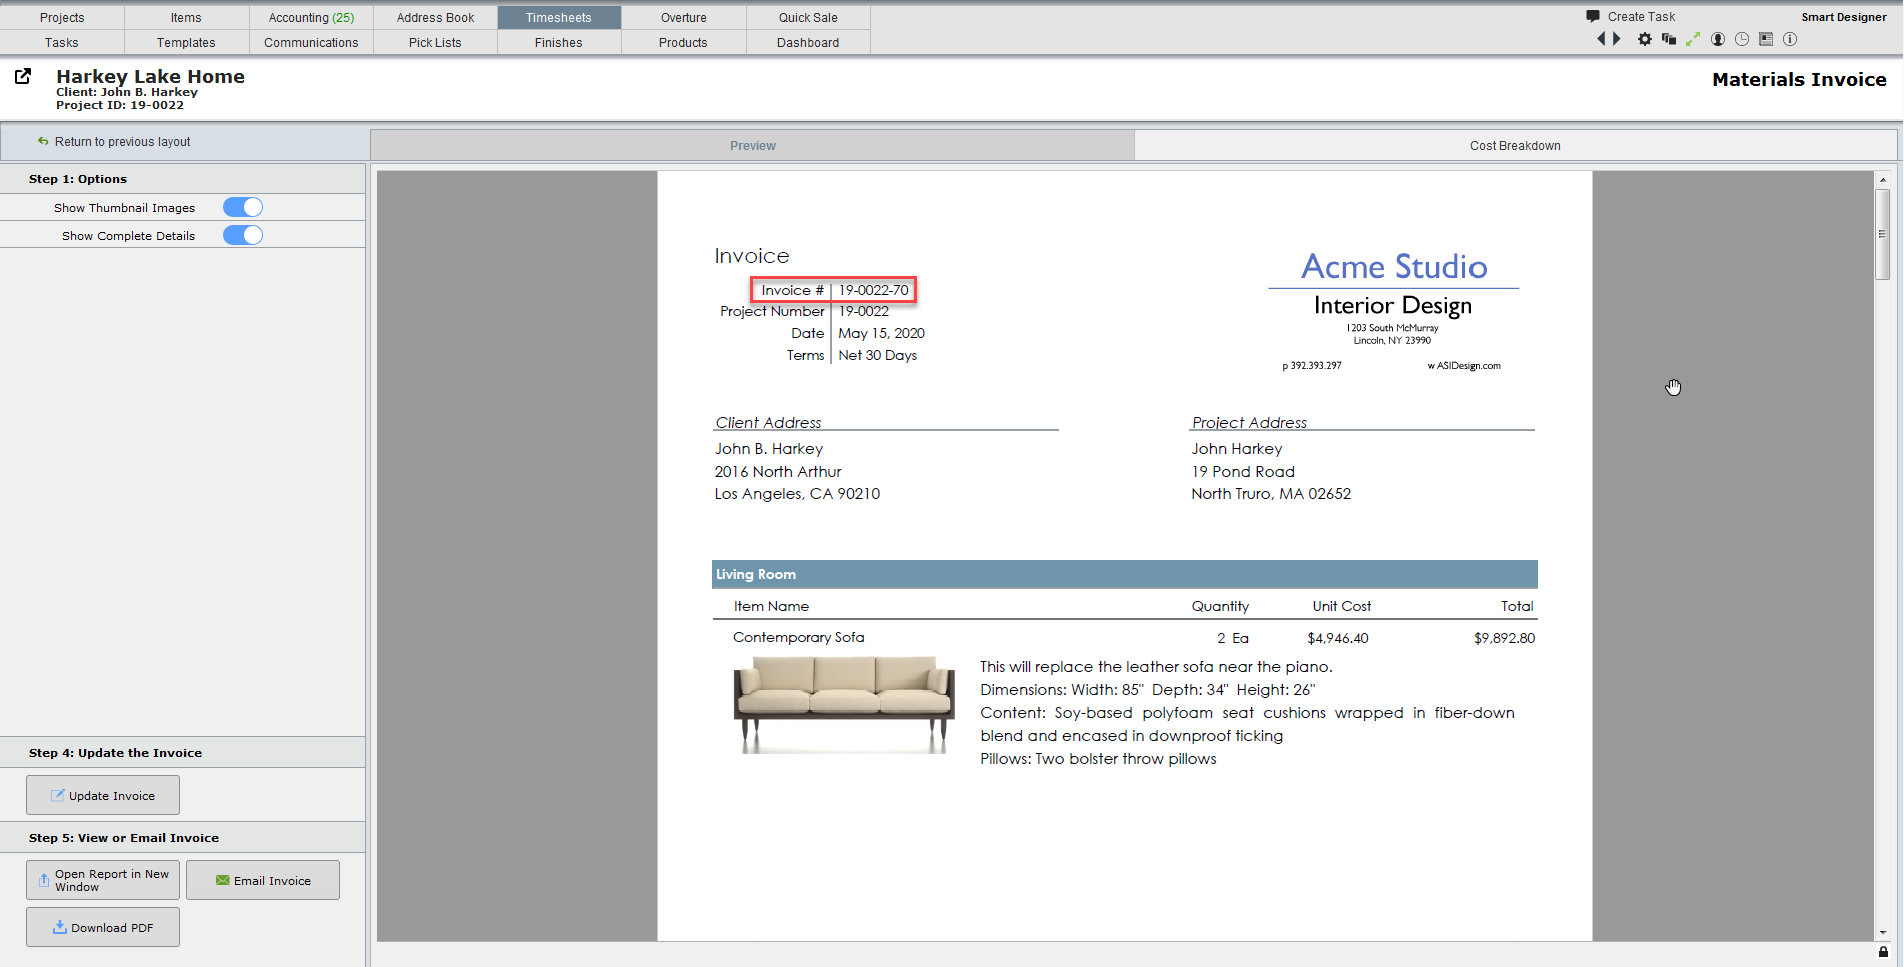
The image below shows that the invoice has been created because it has an invoice number.

Note that in the image above the Invoice number is 19-0022-70. This number is made up of the Project ID # 19-0022-70 and the fact that this is the 70th invoice in the project.
When you return to the Items List View, you will see a 70 in the Invoice column (see image below), but the actual Invoice number is 18-1011-05
